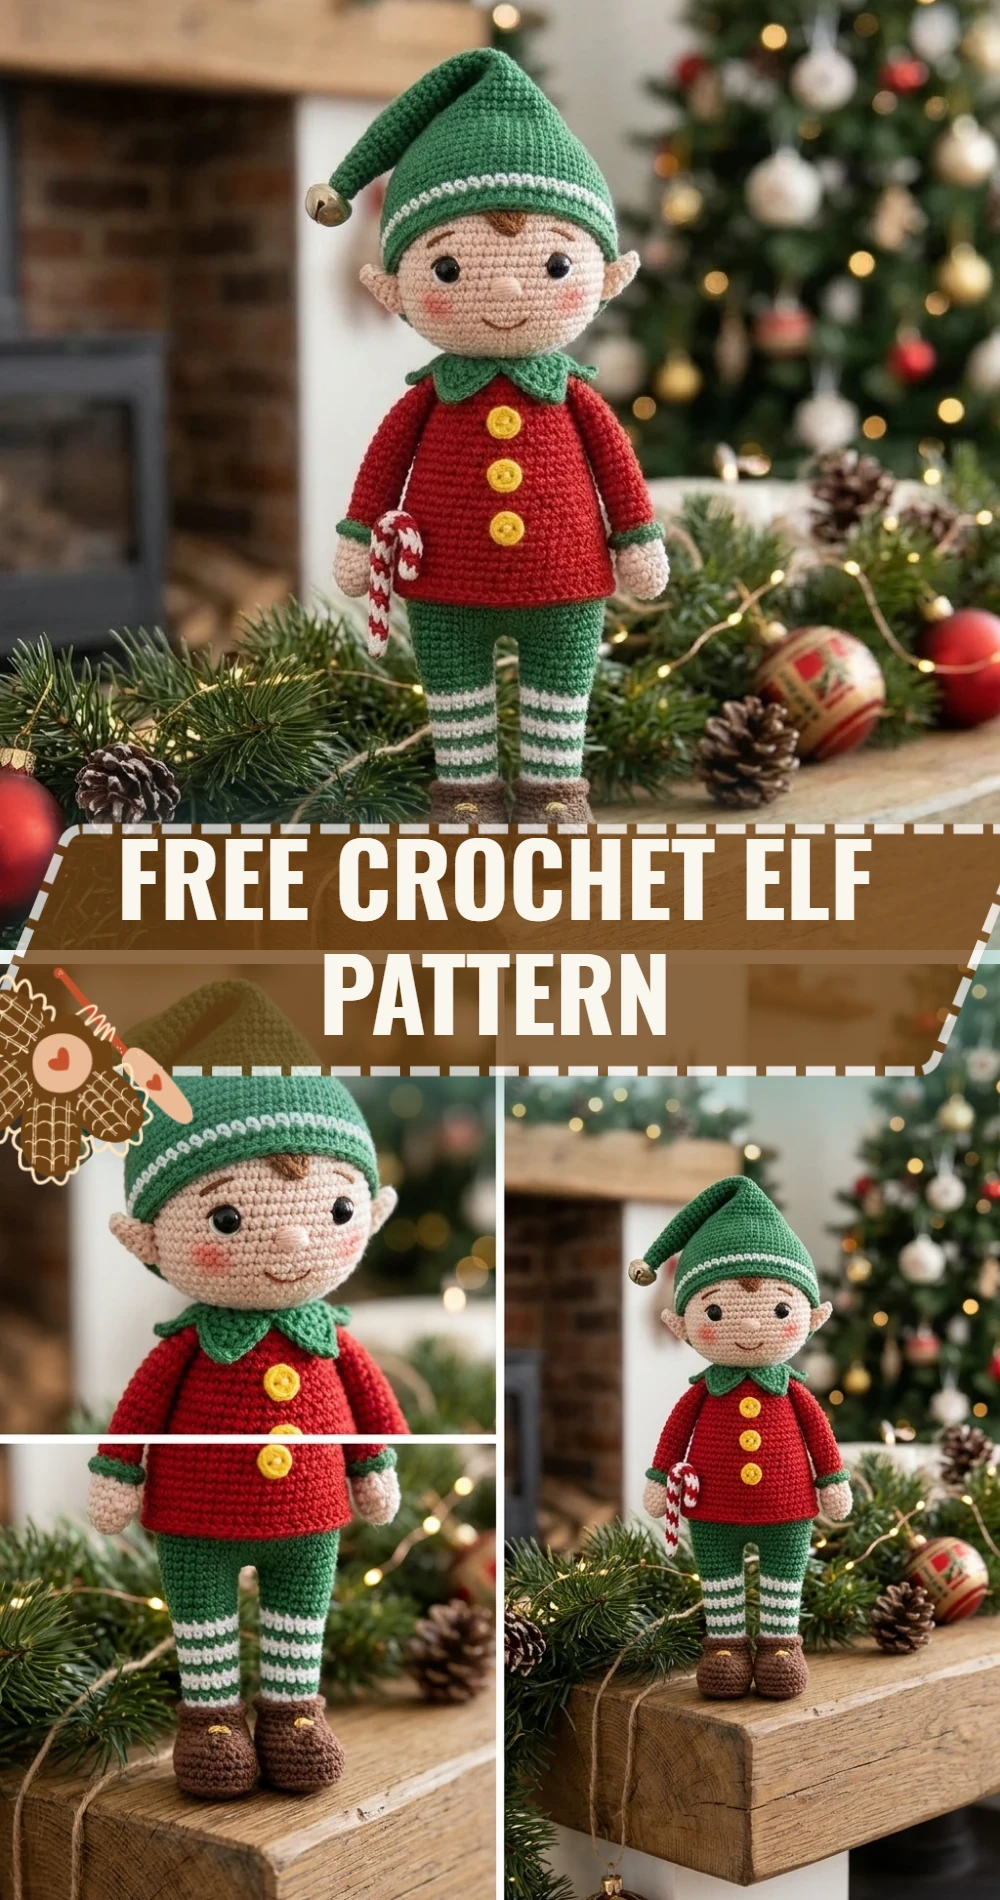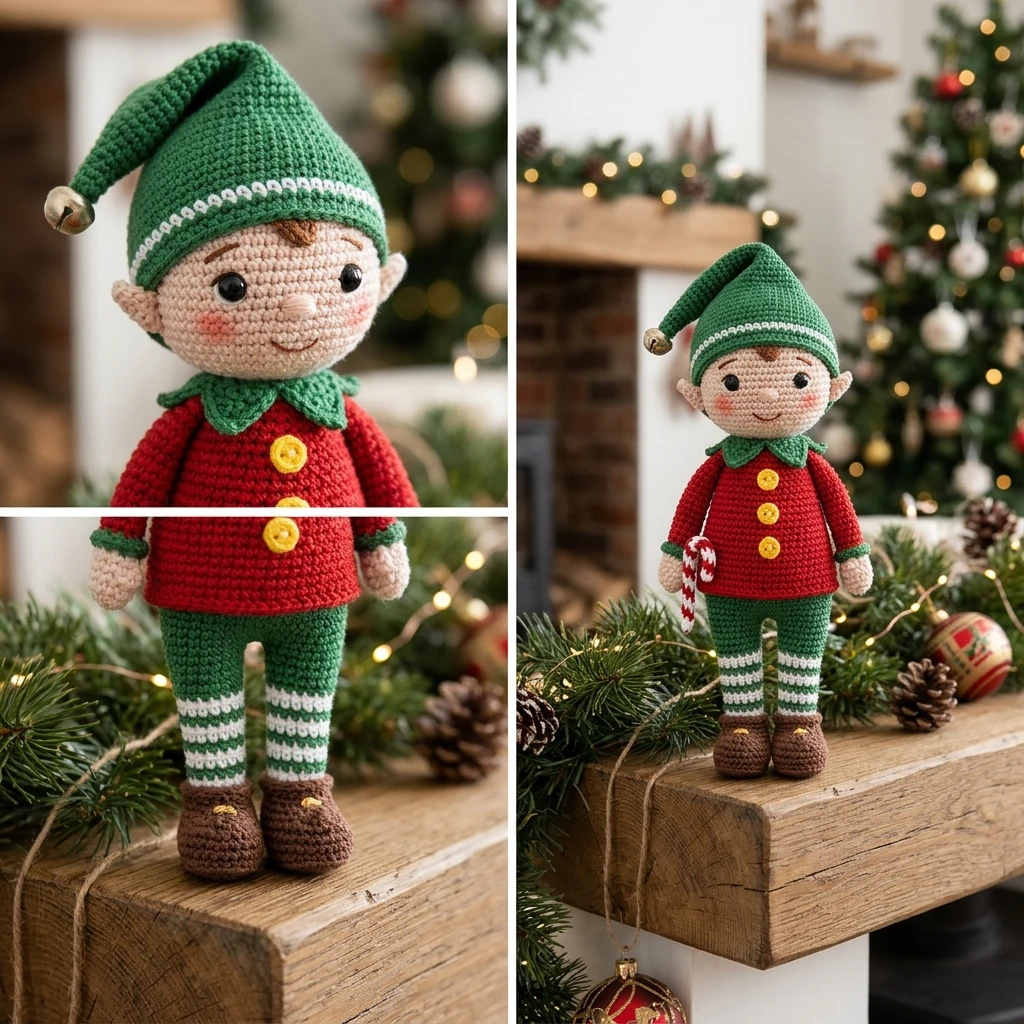
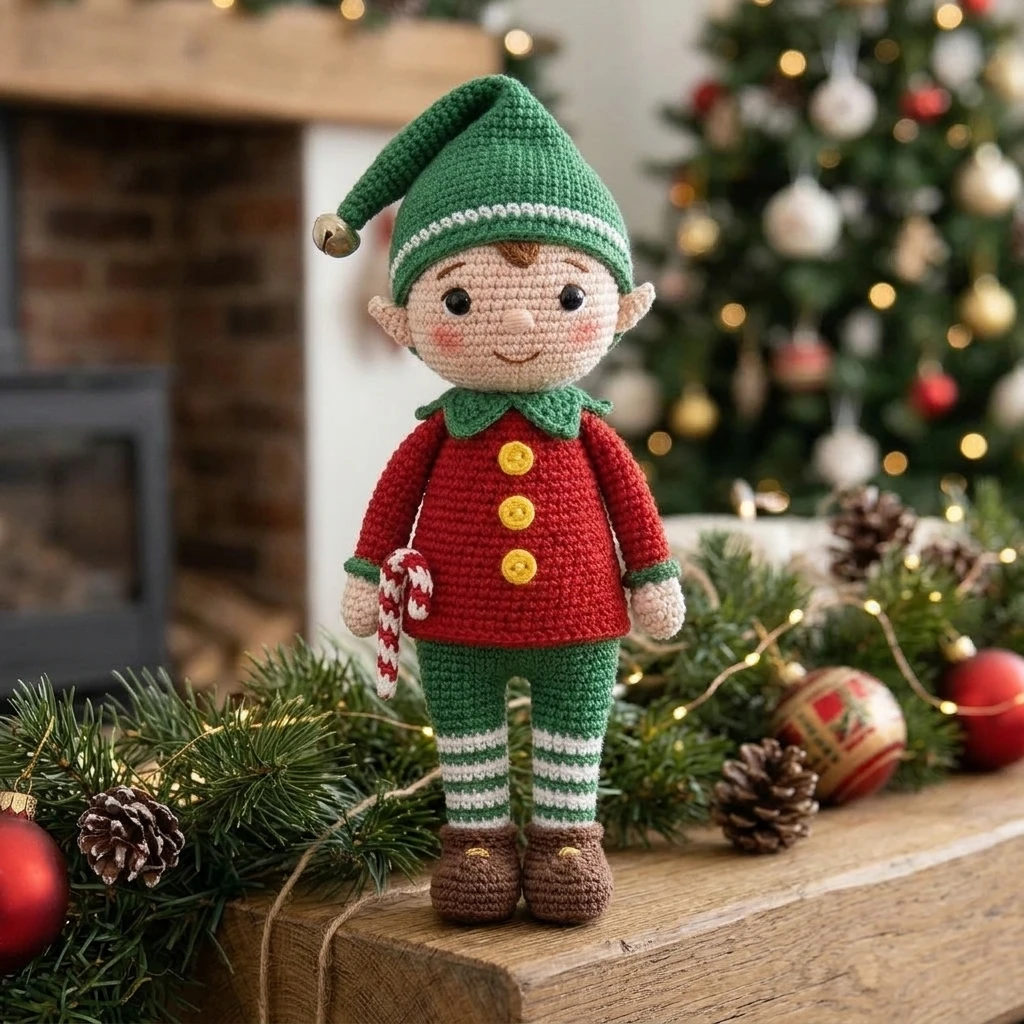
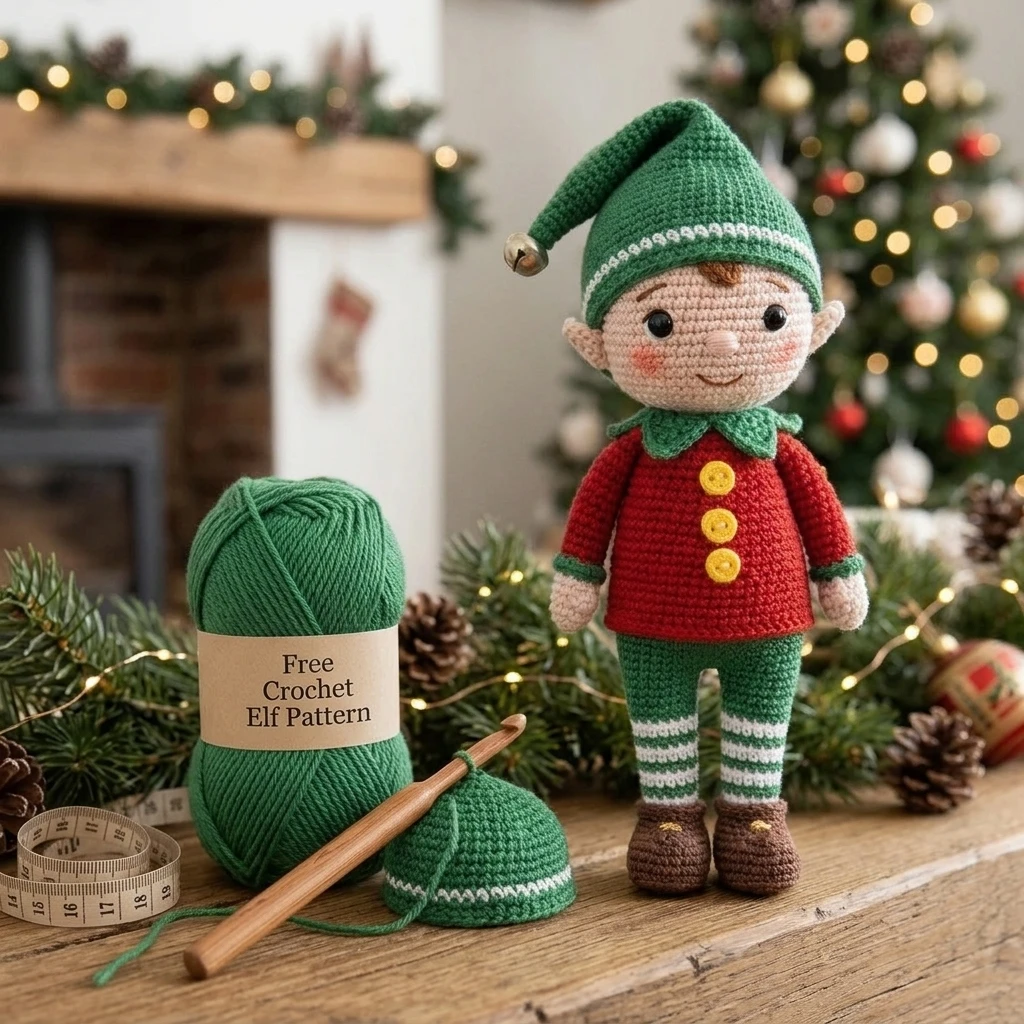
Bring a touch of whimsical holiday magic into your home with this charming crochet elf. This festive amigurumi features the classic pointed hat, tiny elf ears, and iconic curled-toe boots that define the North Pole’s hardest workers. Designed with a sturdy, upright posture and a cheerful expression, this project serves as a perfect shelf sitter or a handmade gift for children. The construction primarily utilizes continuous rounds for a seamless finish, making it an approachable yet detailed project for those familiar with basic crochet shaping.
The Design: What Makes This Pattern Different
The visual identity of this elf relies on sharp color transitions and structural integrity. Unlike many flat or floppy plushies, this design utilizes a reinforced neck and weighted base to ensure the elf sits perfectly on a mantel or bookshelf. One of the standout features is the integrated color-work for the striped stockings, which eliminates the bulk often found in seamed pieces. A common mistake to avoid is stuffing the limbs too firmly at the joints; keeping the top of the legs and arms lightly stuffed allows the elf to pose naturally rather than looking stiff and unyielding.
Project Info at a Glance
| Feature | Details |
|---|---|
| Skill Level | Intermediate (due to small parts and color changes) |
| Estimated Time | 5 to 7 hours |
| Finished Size | Approximately 11 inches tall (including hat) |
| Hook Size | 3.25mm (D) or size needed to obtain a tight gauge |
| Yarn Weight | Worsted Weight (Medium / 4) |
| Gauge | 5 sc x 5 rows = 1 inch (Photo-inspired) |
| Best For | Holiday decor, heirloom gifts, and mantel displays |
Materials and Tools
Yarn
To achieve the vibrant look shown in our project photos, we suggest using a durable acrylic or cotton-blend yarn. You will need approximately 100 yards of Emerald Green for the tunic and hat, 50 yards of Ruby Red for the accents, 30 yards of White for the stripes, and 40 yards of a Skin Tone of your choice for the face and hands. A small amount of Black is needed for the boots.
Tools
A 3.25mm crochet hook is essential to keep your stitches tight enough that the polyester fiberfill doesn’t peek through. You will also need a tapestry needle for assembly, a stitch marker to track continuous rounds, 9mm safety eyes, and a small amount of embroidery floss for the mouth and eyebrows.
Abbreviations
Pattern — Step by Step
Legs and Feet (Make 2)
The legs are worked from the boot upward. Start with Black yarn.
- Round 1: 6 sc in MR (6).
- Round 2: *inc* around (12).
- Round 3-5: sc in each st around (12).
- Change to Red. Round 6: sc in BLO around (12).
- Round 7-15: Alternate 2 rounds White, 2 rounds Red to create stripes (12). Fasten off first leg, do not fasten off second.
Body and Head
Join the legs with a chain of 2. This creates a seamless transition from the lower body to the neck.
- Round 1: sc around both legs and the ch-2 bridges (28).
- Round 2-10: sc in each st around in Green (28).
- Round 11: *sc 5, dec* around (24).
- Round 12-14: sc in each st around (24).
- Change to Skin Tone. Round 15: *sc 2, dec* around (18).
- Round 16: *inc* around (36).
- Round 17-24: sc in each st around (36). Insert safety eyes between rounds 20 and 21.
- Round 25: *sc 4, dec* around (30).
- Round 26: *sc 3, dec* around (24). Stuff firmly.
- Round 27: *sc 2, dec* around (18).
- Round 28: *sc 1, dec* around (12).
- Round 29: dec around (6). Close hole.
Arms (Make 2)
The arms are worked in simple rounds without much stuffing to allow for movement.
- Start with Skin Tone. Round 1: 6 sc in MR (6).
- Round 2: *sc 2, inc* around (8).
- Round 3-4: sc in each st around (8).
- Change to Green. Round 5-12: sc in each st around (8). Fasten off, leaving a long tail.
Pointed Elf Hat
The hat is worked in a long cone shape to provide that iconic holiday silhouette.
- Start with Green. Round 1: 4 sc in MR (4).
- Round 2: *sc 1, inc* (6).
- Round 3: sc around (6).
- Round 4: *sc 2, inc* (8).
- Continue increasing by 2 stitches every other round until you reach 36 stitches.
- Final 2 Rounds: Change to Red or White for a brim, sc around.
Assembly
Before sewing, pin all pieces in place to ensure symmetry. The elf’s personality comes through in the placement of the ears and the angle of the hat.
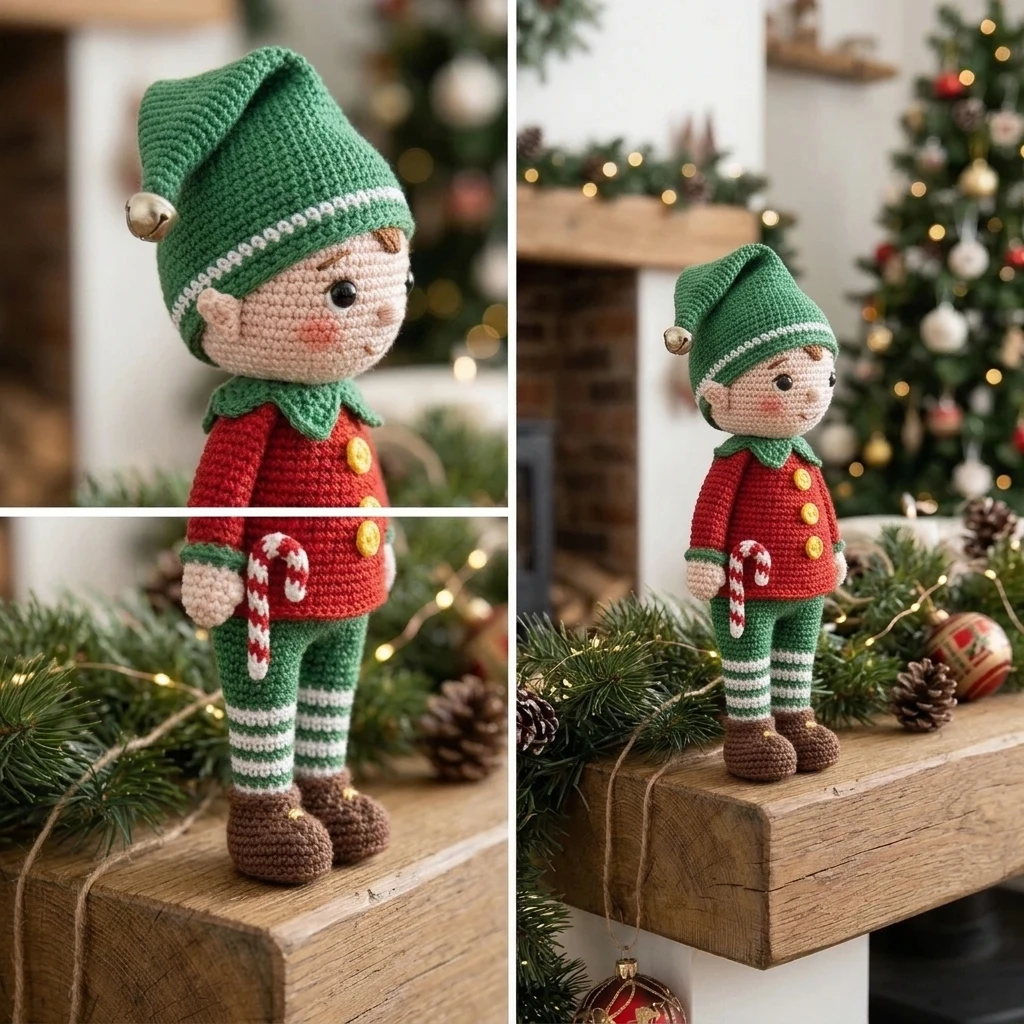
- Sew the arms to the sides of the body at round 14 (just below the neck).
- Attach the ears to the sides of the head, aligned with the eyes.
- Stuff the hat lightly so it retains its shape but remains flexible, then sew it to the top of the head.
- Embroider a small “V” shaped nose in skin tone yarn between the eyes.
- Add a small smile using black embroidery floss.
- If desired, sew a small bell to the tip of the hat or the toes of the boots for a festive sound.
7 Technical Tips for a Better Free Crochet Elf Pattern
- Master the Invisible Decrease: To prevent gaps in your amigurumi where stuffing might show, use the invisible decrease method (working only in the front loops).
- Maintain Tension: Use a hook size smaller than what the yarn label recommends. This ensures a stiff fabric that holds the elf’s shape.
- Stagger Your Increases: When widening the head or body, stagger the increases so they don’t form a visible “seam” or pentagon shape.
- Color Change Cleanliness: Change colors in the last pull-through of the previous stitch for a sharp, professional stripe on the legs.
- Weighting the Base: Place a small bag of plastic poly-pellets in the bottom of the body before stuffing to help the elf sit upright without toppling.
- Avoid Over-stuffing the Neck: Stuff the head and body firmly, but leave the very top of the neck slightly more pliable to prevent the “bobblehead” effect.
- Symmetry Check: Use the “mirror test” by holding your elf up to a mirror to see if the ears and arms are level; our eyes often miss slight slants when looking directly at the piece.
Frequently Asked Questions
Can I use fuzzy yarn for the hat brim?
Yes! Using a white “pipsqueak” or chenille yarn for the brim of the hat and the cuffs of the sleeves adds a wonderful textural contrast that looks very professional.
How do I make the elf poseable?
You can insert a plastic-coated wire or a chenille stem (pipe cleaner) into the arms and legs before stuffing. Be sure to fold the ends over to prevent the sharp points from poking through the stitches.
What is the best way to clean my crochet elf?
If using acrylic yarn, spot cleaning with a damp cloth is best. If the elf is heavily played with, place it in a mesh laundry bag and wash on a delicate cycle, then air dry completely.
Is this pattern safe for babies?
If making this for a child under three, replace the plastic safety eyes with embroidered eyes using black yarn to eliminate any choking hazards.
My hat is too small for the head, what happened?
Amigurumi tension can vary. If the hat is too tight, restart and add one or two more increase rounds at the base of the hat to accommodate the circumference of the head.
Conclusion
Creating your own crochet elf is a rewarding way to add a personalized touch to your holiday celebrations. By focusing on tight stitches and careful assembly, you can produce a high-quality heirloom that will be cherished for seasons to come. Don’t forget to experiment with different yarn colors to create a whole workshop of unique characters! If you enjoyed this project, please save it to your “Holiday Crochet” board on Pinterest. What color combination are you planning to use for your elf’s festive outfit?
Save This Crochet Pattern