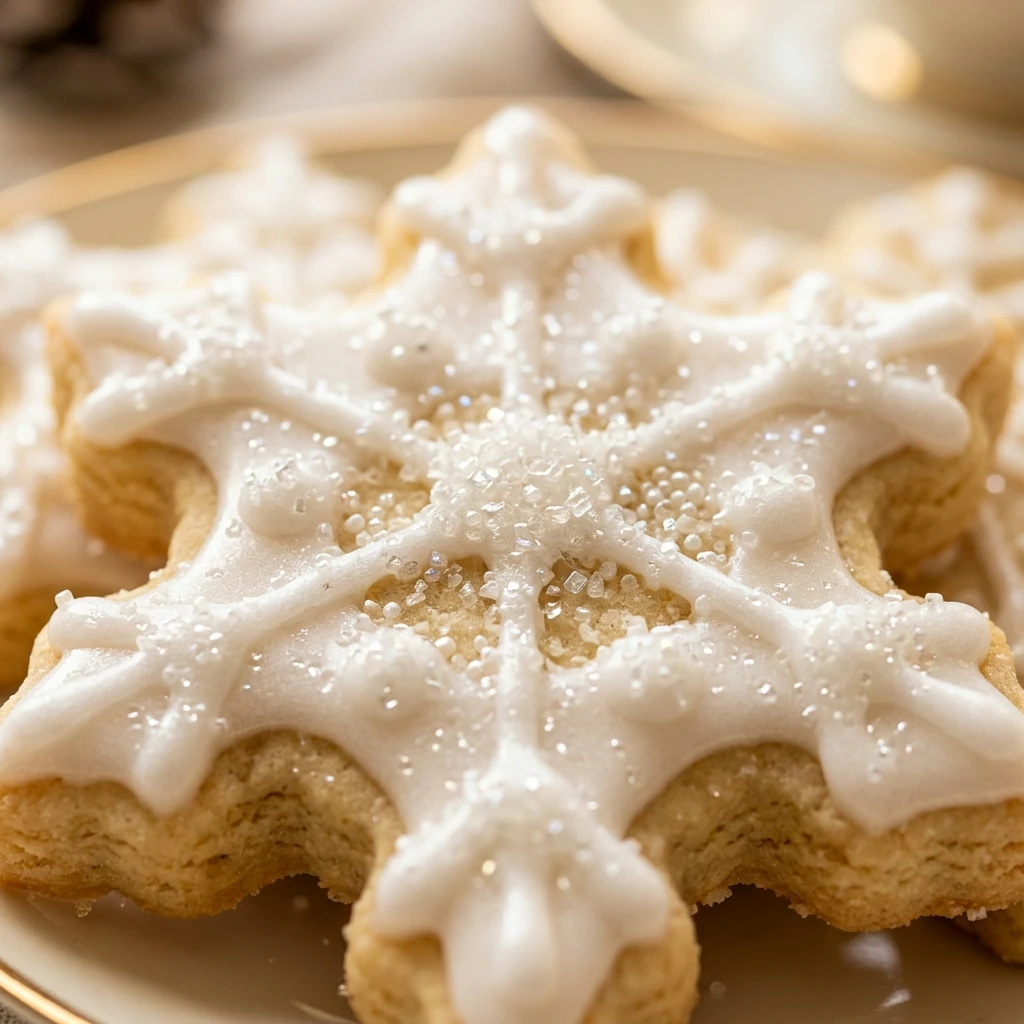
There is nothing quite like the smell of buttery sugar cookies wafting through the kitchen during the holidays or for a special celebration. This recipe yields the absolute best cutout sugar cookies you will ever taste. They hold their shape perfectly in the oven, meaning no more blobs where your stars and hearts used to be. Paired with a smooth, professional-grade royal icing that dries to a beautiful matte finish, these cookies are as fun to decorate as they are to eat. Whether you are a beginner or a seasoned baker, this guide will help you create bakery-quality treats right at home.
Recipe Information
- Prep Time: 45 minutes
- Cook Time: 10 minutes
- Total Time: 55 minutes
- Servings: 24 cookies
- Difficulty: Medium
Nutrition values
- Calories: 185 kcal
- Protein: 2g
- Carbs: 28g
Why Make This Best Cutout Sugar Cookies with Royal Icing
This recipe is a staple for a reason. Unlike many recipes that puff up or spread, these cookies maintain sharp edges, making them the perfect canvas for intricate designs. The addition of almond extract provides a sophisticated flavor profile that balances the sweetness of the royal icing. The texture is the ideal middle ground: soft enough to bite into easily, but sturdy enough to hold up to layers of icing and decorations. Plus, the icing recipe uses meringue powder, which makes it safe to eat and much easier to work with than traditional egg white versions.
Ingredients
For the Cookies:
- 1 cup unsalted butter, softened to room temperature
- 1 cup granulated sugar
- 1 large egg
- 1 teaspoon vanilla extract
- 1/2 teaspoon almond extract
- 3 cups all-purpose flour
- 1/2 teaspoon baking powder
- 1/4 teaspoon salt
For the Royal Icing:
- 4 cups powdered sugar, sifted
- 3 tablespoons meringue powder
- 5-7 tablespoons warm water
- Gel food coloring (optional)
Directions
Step 1: Cream the Butter and Sugar
In a large bowl or the bowl of a stand mixer, cream together the softened butter and granulated sugar. Beat on medium-high speed for about 2 to 3 minutes until the mixture looks pale and fluffy. This step incorporates air and ensures a light texture.
Step 2: Incorporate Wet Ingredients
Add the egg, vanilla extract, and almond extract to the butter mixture. Continue beating until the egg is fully incorporated and the mixture is smooth. Scrape down the sides of the bowl with a spatula to ensure everything is evenly mixed.
Step 3: Combine Dry Ingredients
In a separate medium bowl, whisk together the all-purpose flour, baking powder, and salt. Gradually add the dry ingredients to the wet ingredients while mixing on low speed. Mix just until the dough comes together and no streaks of flour remain. Do not overmix, as this can make the cookies tough.
Step 4: Chill the Dough
Divide the dough into two equal portions. Flatten each portion into a disk and wrap tightly in plastic wrap. Place the dough in the refrigerator to chill for at least 1 hour. Chilling prevents the butter from melting too quickly in the oven, which keeps your shapes sharp.
Step 5: Roll and Cut Shapes
Preheat your oven to 350°F (175°C) and line baking sheets with parchment paper. On a lightly floured surface, roll out one disk of dough to about 1/4-inch thickness. Use cookie cutters to cut out your desired shapes. Re-roll the scraps as needed until all the dough is used.
Step 6: Bake to Perfection
Place the cookie cutouts on the prepared baking sheets, spaced about 1 inch apart. Bake for 8 to 10 minutes. The cookies are done when the edges are just barely set and they look matte on top. Do not wait for them to brown. Let them cool on the pan for 5 minutes before transferring to a wire rack to cool completely.
Step 7: Prepare the Royal Icing
In a clean bowl, whisk together the powdered sugar and meringue powder. Add 5 tablespoons of warm water and beat on high speed with a hand mixer or stand mixer for 5 to 7 minutes. The icing should be thick and glossy. Add more water, half a teaspoon at a time, to reach your desired consistency for outlining and flooding.
Step 8: Decorate and Set
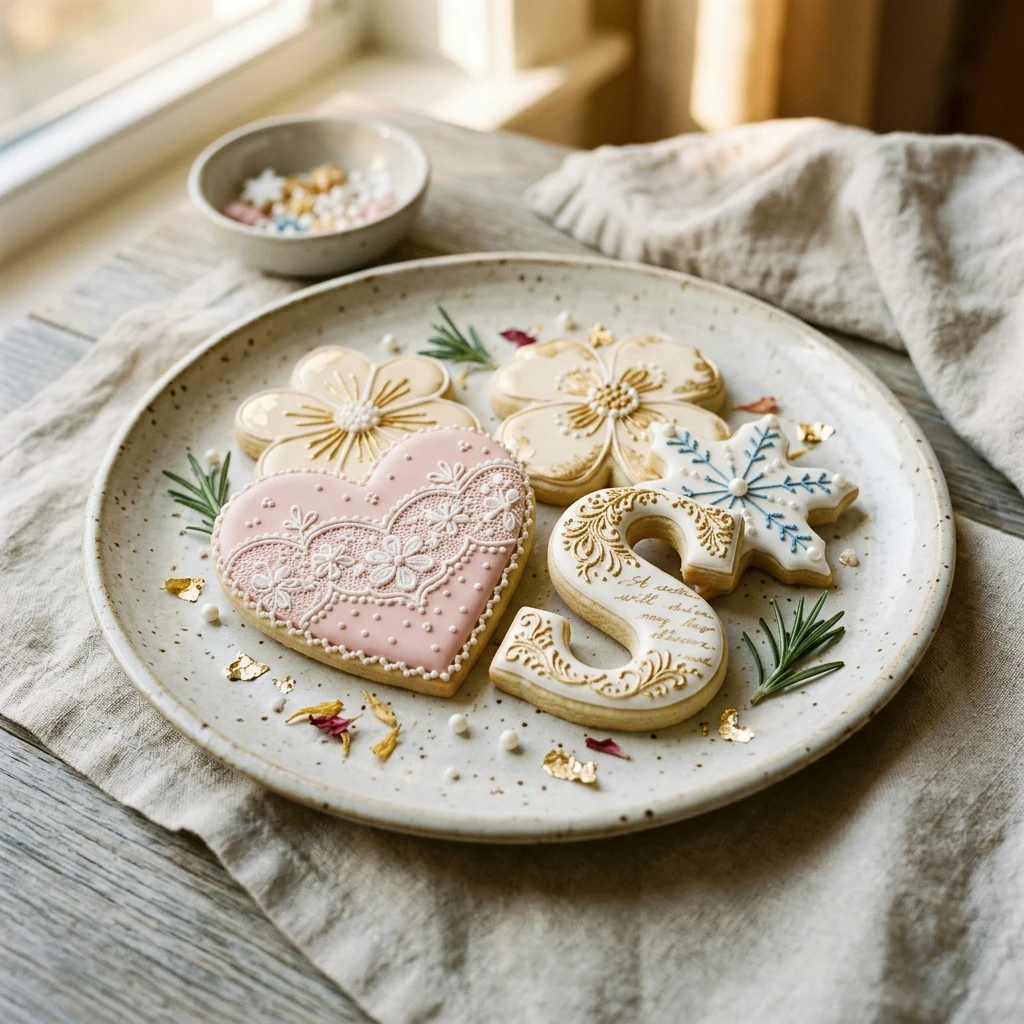
Divide the icing into smaller bowls and add gel food coloring if desired. Use a piping bag to outline the cookies, then “flood” the centers with slightly thinner icing. Allow the cookies to sit undisturbed for at least 4 to 6 hours, or overnight, until the icing is completely hard.
Expert Tips for Perfect Best Cutout Sugar Cookies with Royal Icing
- Use Room Temperature Ingredients: Ensure your butter and egg are at room temperature so they emulsify properly, creating a uniform dough.
- Don’t Skip the Chilling: If the dough gets too warm while you are working with it, pop it back in the fridge for 10 minutes. Cold dough is the secret to zero spread.
- Measure Flour Correctly: Use the “spoon and level” method for flour. Packing flour into a measuring cup can result in dry, crumbly cookies.
- Consistency is Key: For royal icing, “15-second icing” is the gold standard for flooding. When you drop a bit of icing back into the bowl, it should take 15 seconds to disappear completely.
- Avoid Overbaking: Sugar cookies continue to firm up as they cool. Take them out when they look slightly underdone for the softest results.
Delicious Variations
- Lemon Zest: Add the zest of one lemon to the dough for a bright, citrusy twist.
- Chocolate Sugar Cookies: Replace 1/2 cup of flour with unsweetened cocoa powder for a rich chocolate version.
- Spiced Cookies: Add 1 teaspoon of cinnamon and 1/4 teaspoon of nutmeg to the dry ingredients for a warm, autumnal flavor.
- Sparkling Finish: Sprinkle sanding sugar or edible glitter onto the wet royal icing for a festive, shimmering effect.
Frequently Asked Questions
How do I prevent my cookies from spreading?
The most common cause of spreading is warm dough or using too much leavening agent. Ensure your dough is chilled thoroughly before cutting and baking. Also, check that your baking powder is fresh and measured accurately.
Can I make the dough in advance?
Yes! You can store the wrapped dough disks in the refrigerator for up to 3 days. You can also freeze the dough for up to 3 months. Just thaw it in the fridge overnight before rolling it out.
How long does the royal icing take to dry?
Royal icing typically takes 6 to 12 hours to dry completely, depending on the humidity in your kitchen. It is best to let them set overnight before stacking or packaging them.
What is the best way to store decorated cookies?
Once the icing is completely hard, store the cookies in an airtight container at room temperature. Place layers of parchment paper between the cookies to prevent any accidental sticking or scratching. They will stay fresh for up to one week.
Can I use liquid food coloring for the icing?
It is highly recommended to use gel food coloring. Liquid coloring can thin out the royal icing and change its consistency, making it harder to pipe. Gel colors are more concentrated and provide vibrant hues with just a tiny drop.
Conclusion
Mastering the art of cutout sugar cookies is a rewarding skill that brings joy to any occasion. With this reliable recipe, you no longer have to worry about losing your shapes or ending up with bland treats. The combination of a sturdy, flavorful base and a professional royal icing allows your creativity to shine. Gather your favorite cookie cutters, mix up a batch of dough, and enjoy the process of creating edible art that tastes even better than it looks!


Best Cutout Sugar Cookies with Royal Icing
- Total Time: 55 minutes
- Diet: Vegetarian
Ingredients
- 1 cup unsalted butter, softened to room temperature
- 1 cup granulated sugar
- 1 large egg
- 1 teaspoon vanilla extract
- 1/2 teaspoon almond extract
- 3 cups all-purpose flour
- 1/2 teaspoon baking powder
- 1/4 teaspoon salt
- 4 cups powdered sugar, sifted
- 3 tablespoons meringue powder
- 5–7 tablespoons warm water
- Gel food coloring (optional)
Instructions
- In a large bowl or the bowl of a stand mixer, cream together the softened butter and granulated sugar. Beat on medium-high speed for about 2 to 3 minutes until the mixture looks pale and fluffy. This step incorporates air and ensures a light texture.
- Add the egg, vanilla extract, and almond extract to the butter mixture. Continue beating until the egg is fully incorporated and the mixture is smooth. Scrape down the sides of the bowl with a spatula to ensure everything is evenly mixed.
- In a separate medium bowl, whisk together the all-purpose flour, baking powder, and salt. Gradually add the dry ingredients to the wet ingredients while mixing on low speed. Mix just until the dough comes together and no streaks of flour remain. Do not overmix, as this can make the cookies tough.
- Divide the dough into two equal portions. Flatten each portion into a disk and wrap tightly in plastic wrap. Place the dough in the refrigerator to chill for at least 1 hour. Chilling prevents the butter from melting too quickly in the oven, which keeps your shapes sharp.
- Preheat your oven to 350°F (175°C) and line baking sheets with parchment paper. On a lightly floured surface, roll out one disk of dough to about 1/4-inch thickness. Use cookie cutters to cut out your desired shapes. Re-roll the scraps as needed until all the dough is used.
- Place the cookie cutouts on the prepared baking sheets, spaced about 1 inch apart. Bake for 8 to 10 minutes. The cookies are done when the edges are just barely set and they look matte on top. Do not wait for them to brown. Let them cool on the pan for 5 minutes before transferring to a wire rack to cool completely.
- In a clean bowl, whisk together the powdered sugar and meringue powder. Add 5 tablespoons of warm water and beat on high speed with a hand mixer or stand mixer for 5 to 7 minutes. The icing should be thick and glossy. Add more water, half a teaspoon at a time, to reach your desired consistency for outlining and flooding.
- Divide the icing into smaller bowls and add gel food coloring if desired. Use a piping bag to outline the cookies, then “flood” the centers with slightly thinner icing. Allow the cookies to sit undisturbed for at least 4 to 6 hours, or overnight, until the icing is completely hard.
- Cook Time: 55 minutes