Recipe Information
- Prep Time: 15 minutes
- Cook Time: 0 minutes
- Total Time: 15 minutes + 4-6 hours freezing
- Servings: 4
- Difficulty Level: Easy
Nutrition Information
- Calories per serving: 150
- Protein: 5 grams
- Carbohydrates: 25 grams
- Fat: 7 grams
- Fiber: 4 grams
- Sugar: 10 grams
- Sodium: 200 mg
Why Make This Ninja Creami Chickpea Ice Cream
Looking to satisfy your sweet tooth with a healthier twist? The Ninja Creami Chickpea Ice Cream is not only a scrumptious treat but also a brilliant way to incorporate more plant-based goodness into your diet. Chickpeas, the star ingredient, provide a surprisingly creamy texture and a hint of nutty flavor. By making your ice cream at home, you can control the sweetness and add any mix-ins you prefer, making this dessert as versatile as it is delightful. Perfect for warm days or as a unique dessert during a dinner party, this recipe is an absolute must-try!
How to Make Ninja Creami Chickpea Ice Cream
Creating this delightful ice cream is straightforward and fun. With just a few simple steps, you’ll have a creamy, delicious treat ready to enjoy. Don’t worry if you’ve never made ice cream before—the Ninja Creami makes the process easy and enjoyable!
Ingredients:
- 1 can of chickpeas, drained and rinsed
- 1 cup of coconut milk
- 1/2 cup of maple syrup
- 1 teaspoon vanilla extract
- Pinch of salt
- Optional mix-ins (e.g., chocolate chips, fruit)
Directions:
-
Step 1: Preparation
In a blender, combine the drained and rinsed chickpeas, coconut milk, maple syrup, vanilla extract, and a pinch of salt. Blend until the mixture is completely smooth and creamy.
-
Step 2: Freezing
Pour the blended mixture into a container and place it in the freezer. Allow it to freeze for 4-6 hours or until it is solid throughout.
-
Step 3: Churning
Once frozen, remove the container from the freezer. Use the Ninja Creami to churn the frozen mixture according to the manufacturer’s instructions, which will give it that velvety ice cream consistency.
-
Step 4: Mix-Ins
If you want to add optional ingredients like chocolate chips or fruit, mix them in gently after churning. This step allows you to customize your ice cream to suit your tastes.
-
Step 5: Serve
Dish out your Chickpea Ice Cream into bowls or cones and enjoy this unique and delightful treat!
How to Serve Ninja Creami Chickpea Ice Cream
Serve your Chickpea Ice Cream in bowls or waffle cones garnished with fresh fruit, a drizzle of maple syrup, or even a sprinkle of shredded coconut. It makes a refreshing dessert for summer barbecues, birthday parties, or any casual family gathering. You can also create an ice cream sundae by adding your favorite toppings like nuts, granola, or whipped cream for an extra indulgent experience!
How to Store Ninja Creami Chickpea Ice Cream
To store your ice cream, keep it in an airtight container in the freezer. It’s best enjoyed within a week, as homemade ice creams can become icy over longer storage periods. If you want to enjoy it later, allow it to thaw for about 10-15 minutes at room temperature before serving to regain its soft texture.
Expert Tips for Perfect Ninja Creami Chickpea Ice Cream
- Blend Thoroughly: Ensure the chickpeas are blended very smooth for the creamiest texture.
- Sweetness Adjustments: Feel free to adjust the amount of maple syrup to suit your taste preferences.
- Freeze in Smaller Portions: If possible, freeze the mixture in smaller containers to speed up the freezing process.
- Variation in Dairy-Free Alternatives: If coconut milk isn’t your favorite, you can substitute it with almond milk or cashew milk for different flavor notes.
- Experiment with Flavors: Try adding spices like cinnamon or ginger for an extra depth of flavor.
Delicious Variations
- Chocolate Chickpea Ice Cream: Add cocoa powder into the blender for a chocolatey twist.
- Berry Blast: Blend in your favorite berries such as strawberries or blueberries for a fruity flavor.
- Matcha Ice Cream: Incorporate matcha powder for a refreshing, green tea-flavored ice cream.
- Nutty Delight: Mix in some nut butter, like almond or peanut butter, for a nutty flavor and creamier texture.
- Coffee Lover’s Ice Cream: Add a shot of espresso to satisfy the coffee aficionados in your life.
Frequently Asked Questions
-
Can I use dried chickpeas instead of canned?
Yes, but make sure to soak and cook the dried chickpeas beforehand until they are tender. -
Is this ice cream vegan?
Absolutely! It uses non-dairy coconut milk and natural sweetener maple syrup. -
What if I don’t have a Ninja Creami?
You can use an ice cream maker or blend the mixture in a blender every 30 minutes until it reaches the desired consistency if you don’t have a specialized machine. -
Can I make this ice cream ahead of time?
Yes, you can prepare the mixture in advance, freeze it, and churn it right before serving. -
What’s the best way to soften the ice cream before serving?
Leave the ice cream at room temperature for 10-15 minutes to soften slightly for easier scooping.
Conclusion
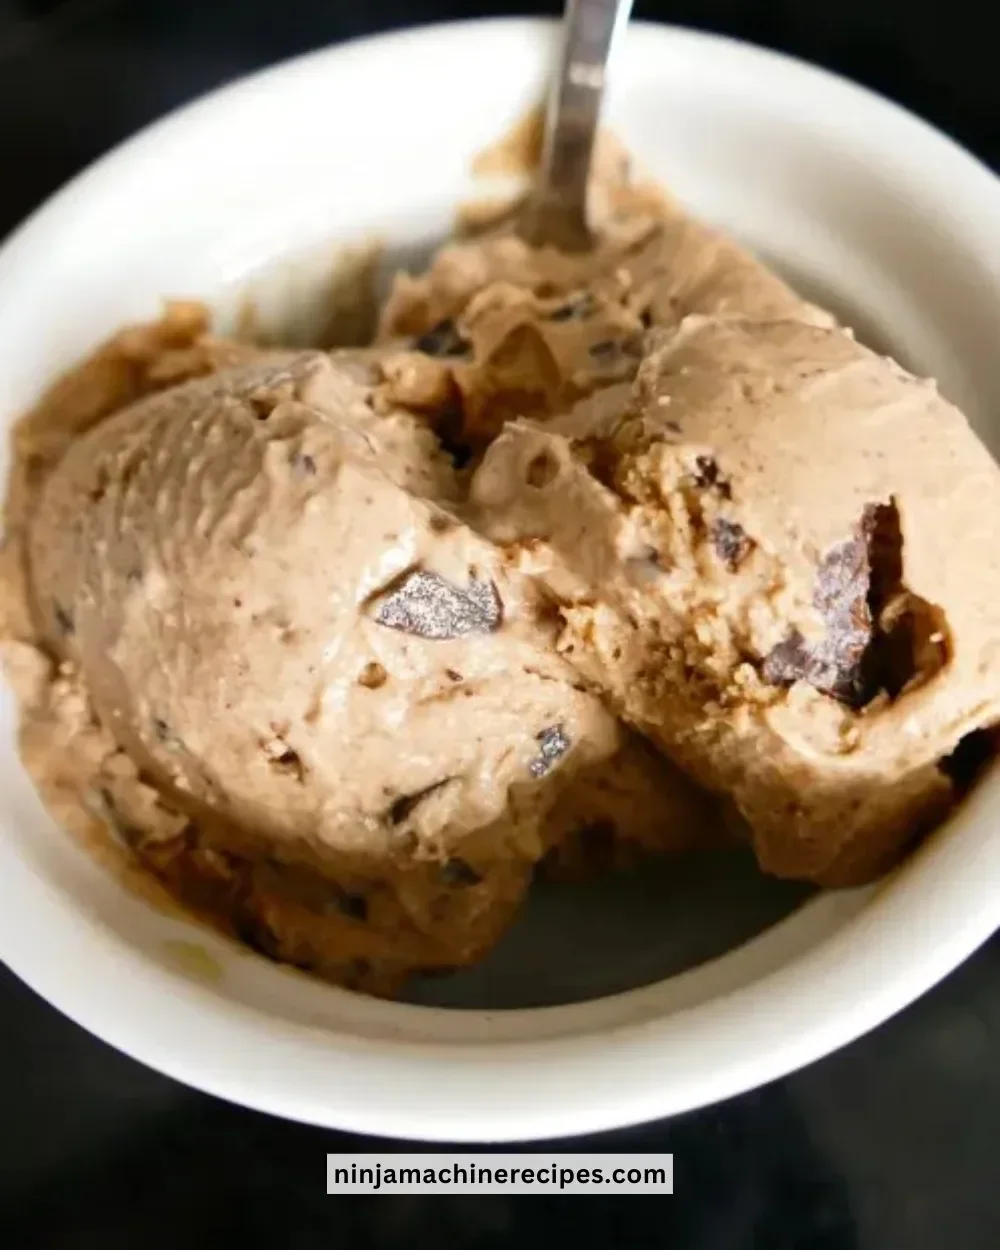
The Ninja Creami Chickpea Ice Cream is a delightful vegan treat that combines creamy texture with natural sweetness. This recipe not only offers a refreshing alternative to traditional ice creams but also packs in protein and fiber from chickpeas. Enjoy experimenting with flavors and mix-ins to personalize your ice cream experience. Gather your ingredients, fire up your Ninja Creami, and let your sweet-toothed adventure begin—happy scooping!
Print
Ninja Creami Chickpea Ice Cream
- Total Time: 270
- Yield: 4 servings 1x
- Diet: Vegan
Description
A delightful vegan ice cream made with chickpeas, offering a creamy texture and natural sweetness, perfect for warm days.
Ingredients
- 1 can of chickpeas, drained and rinsed
- 1 cup of coconut milk
- 1/2 cup of maple syrup
- 1 teaspoon vanilla extract
- Pinch of salt
- Optional mix-ins (e.g., chocolate chips, fruit)
Instructions
- In a blender, combine the drained and rinsed chickpeas, coconut milk, maple syrup, vanilla extract, and a pinch of salt. Blend until the mixture is completely smooth and creamy.
- Pour the blended mixture into a container and place it in the freezer. Allow it to freeze for 4-6 hours or until it is solid throughout.
- Once frozen, remove the container from the freezer. Use the Ninja Creami to churn the frozen mixture according to the manufacturer’s instructions, which will give it that velvety ice cream consistency.
- If you want to add optional ingredients like chocolate chips or fruit, mix them in gently after churning.
- Dish out your Chickpea Ice Cream into bowls or cones and enjoy this unique and delightful treat!
Notes
Best enjoyed within a week; allow to thaw for 10-15 minutes before serving for optimal texture.
- Prep Time: 15
- Category: Dessert
- Method: Freezing and Churning
- Cuisine: Vegan
Nutrition
- Serving Size: 1 serving
- Calories: 150
- Sugar: 10g
- Sodium: 200mg
- Fat: 7g
- Saturated Fat: 5g
- Unsaturated Fat: 2g
- Trans Fat: 0g
- Carbohydrates: 25g
- Fiber: 4g
- Protein: 5g
- Cholesterol: 0mg