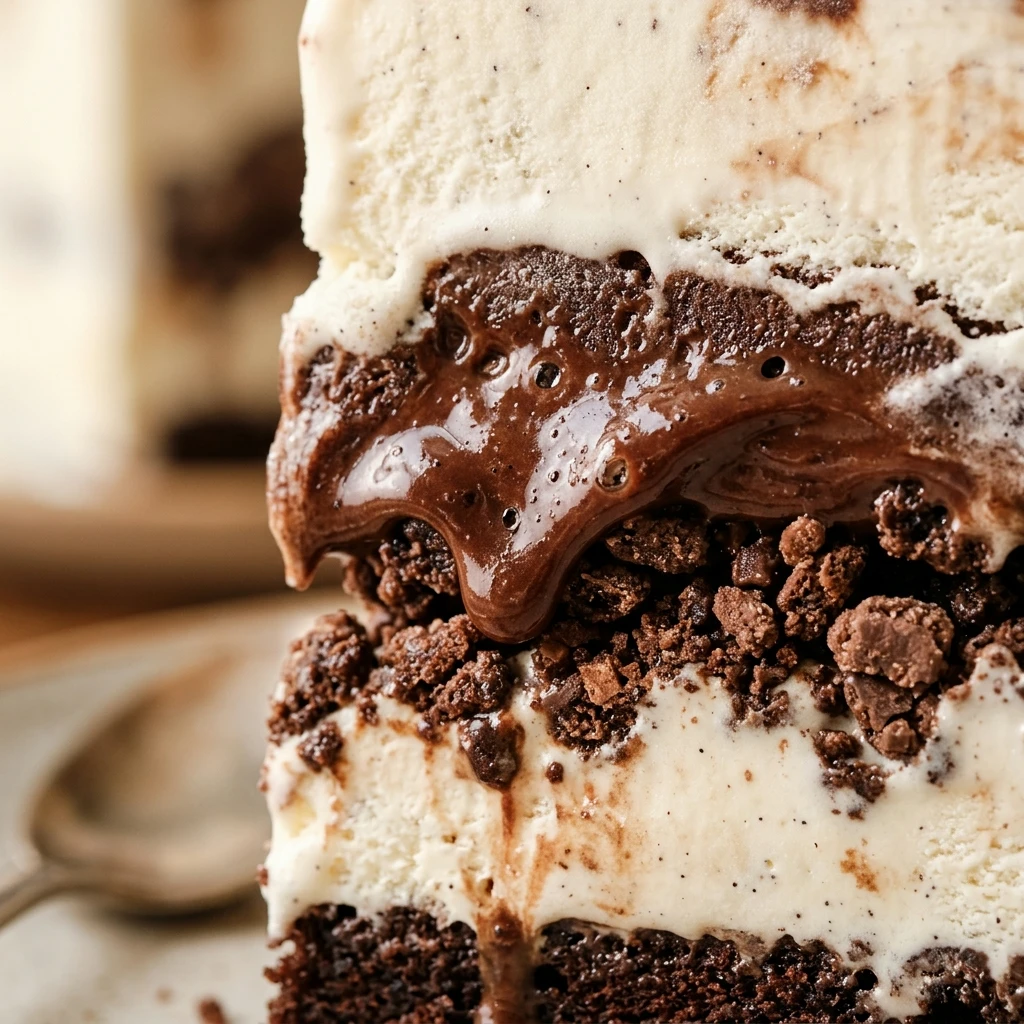
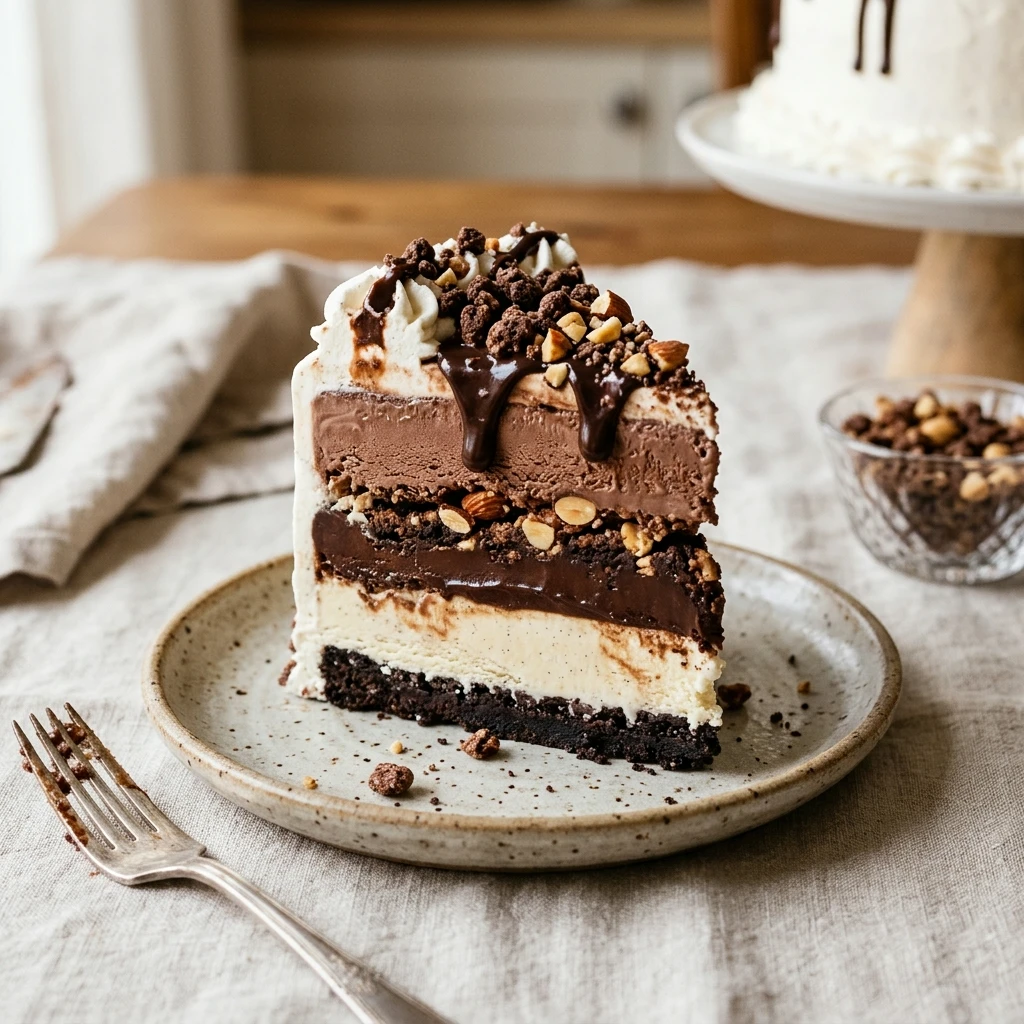
Imagine the ultimate summer dessert: layers of velvety vanilla and rich chocolate ice cream separated by a thick, decadent fudge ripple and that signature chocolatey crunch we all remember from childhood birthday parties. This homemade Ice Cream Cake with Fudge and Crunch Layers is a nostalgic masterpiece that tastes far better than anything you can pull out of a grocery store freezer. It is the perfect centerpiece for birthdays, graduations, or just a hot Saturday afternoon. With a few simple ingredients and a bit of patience for the freezing process, you can create a professional-quality dessert that will have everyone asking for seconds.
Recipe Information
- Prep Time: 45 minutes
- Cook Time: 5 minutes
- Total Time: 50 minutes
- Servings: 12 servings
- Difficulty: Medium
Nutrition values
- Calories: 485 kcal
- Protein: 6g
- Carbs: 58g
Why Make This Ice Cream Cake with Fudge and Crunch Layers
Making your own ice cream cake allows you to control the quality of the ingredients and the thickness of the layers. You get to skip the artificial stabilizers found in store-bought versions and focus on high-quality cream and rich cocoa. The star of the show is the “crunch” layer—made from crushed chocolate cookies and hardened fudge—which provides that addictive texture contrast against the smooth ice cream. Plus, it is incredibly cost-effective to make a large cake at home compared to ordering a custom one from a bakery.
Ingredients
- 1.5 quarts Vanilla ice cream, softened
- 1.5 quarts Chocolate ice cream, softened
- 1 package (14.3 oz) Chocolate sandwich cookies (like Oreos)
- 1/2 cup Unsalted butter, melted
- 1 jar (12 oz) High-quality chocolate fudge sauce
- 1 tub (8 oz) Whipped topping or stabilized whipped cream
- Optional: Sprinkles or extra crushed cookies for garnish
Directions
Step 1: Preparing the Pan and Ice Cream
Line a 9-inch springform pan with plastic wrap, leaving enough overhang on the sides to easily lift the cake out later. Take the vanilla ice cream out of the freezer and let it sit at room temperature for about 10–15 minutes until it is spreadable but not melted. Do not microwave it, as this ruins the texture. Once soft, spread the vanilla ice cream into an even layer at the bottom of the pan. Smooth the top with an offset spatula and place the pan in the freezer for 30 minutes to firm up.
Step 2: Creating the Signature Crunch Layer
While the first layer freezes, place the chocolate sandwich cookies in a large freezer bag and crush them into coarse crumbs using a rolling pin. In a medium bowl, combine the cookie crumbs with the melted butter and stir until well-coated. Spread half of the chocolate fudge sauce over the frozen vanilla layer. Sprinkle the buttered cookie crumbs evenly over the fudge, then lightly press them down. Pour the remaining fudge sauce over the crumbs to lock them in. Return the pan to the freezer for at least 45 minutes until the center is solid.
Step 3: Adding the Final Layers
Softened the chocolate ice cream just like you did with the vanilla. Once the crunch layer is firm, spread the chocolate ice cream over the top, smoothing it out to the edges. Cover the pan tightly with plastic wrap or foil. Freeze the cake for at least 6 hours, or preferably overnight, to ensure it is completely solid throughout.
Step 4: Decorating and Serving
When you are ready to serve, remove the cake from the freezer. Release the sides of the springform pan and lift the cake out using the plastic wrap overhang. Peel away the plastic and place the cake on a serving plate. Spread the whipped topping over the top and sides of the cake. Garnish with sprinkles or extra cookie crumbs if desired. Let the cake sit at room temperature for 5-10 minutes before slicing to make it easier to cut.
Expert Tips for Perfect Ice Cream Cake with Fudge and Crunch Layers
For the cleanest slices, dip a long, sharp knife into a tall glass of hot water before every cut. Wipe the knife dry, slice, and repeat. Another tip is to ensure your fudge sauce is at room temperature when spreading; if it is too cold, it won’t spread, and if it is too hot, it will melt your ice cream layers. Finally, always use a springform pan. Attempting this in a standard cake pan makes it very difficult to remove the cake without destroying the beautiful layers.
Delicious Variations
You can easily customize this recipe to suit your favorite flavors. Try a Peanut Butter Blast version by using peanut butter cup ice cream and adding a layer of melted peanut butter with the fudge. For a Minty Fresh cake, swap the vanilla layer for mint chocolate chip ice cream. If you want a Berry Medley, use strawberry ice cream and replace the chocolate crunch with shortbread crumbles and a strawberry jam ripple.
Frequently Asked Questions
How long does this cake last in the freezer?
If wrapped tightly in plastic wrap and then foil to prevent freezer burn, this cake will stay fresh for up to two weeks.
Can I use homemade whipped cream instead of whipped topping?
Yes, but make sure to stabilize it with a little gelatin or mascarpone cheese so it doesn’t weep or deflate while sitting in the freezer.
What if I don’t have a springform pan?
You can use a 9×13 inch baking dish. Instead of unmolding it, you can simply serve the squares directly from the dish, though you won’t see the side layers as clearly.
My fudge sauce is too thick to spread. What should I do?
Microwave it for 5-10 seconds just to loosen it up, but ensure it is not warm to the touch before pouring it onto the ice cream.
Can I make this dairy-free?
Absolutely. Substitute the ice cream, butter, and fudge with your favorite plant-based alternatives. Coconut-based ice creams work particularly well for this structure.
Conclusion
Mastering the Ice Cream Cake with Fudge and Crunch Layers is a guaranteed way to become the hero of any celebration. It combines the best of all worlds: creamy, crunchy, salty, and sweet. Once you see how simple it is to assemble and how much joy it brings to the table, you will never go back to store-bought again. Grab your favorite ice cream flavors and start layering!
Ice Cream Cake with Fudge and Crunch Layers
- Total Time: 50 minutes
- Diet: Vegetarian
Ingredients
- 1.5 quarts Vanilla ice cream, softened
- 1.5 quarts Chocolate ice cream, softened
- 1 package (14.3 oz) Chocolate sandwich cookies (like Oreos)
- 1/2 cup Unsalted butter, melted
- 1 jar (12 oz) High-quality chocolate fudge sauce
- 1 tub (8 oz) Whipped topping or stabilized whipped cream
- Optional: Sprinkles or extra crushed cookies for garnish
Instructions
- Line a 9-inch springform pan with plastic wrap, leaving enough overhang on the sides to easily lift the cake out later. Take the vanilla ice cream out of the freezer and let it sit at room temperature for about 10–15 minutes until it is spreadable but not melted. Do not microwave it, as this ruins the texture. Once soft, spread the vanilla ice cream into an even layer at the bottom of the pan. Smooth the top with an offset spatula and place the pan in the freezer for 30 minutes to firm up.
- While the first layer freezes, place the chocolate sandwich cookies in a large freezer bag and crush them into coarse crumbs using a rolling pin. In a medium bowl, combine the cookie crumbs with the melted butter and stir until well-coated. Spread half of the chocolate fudge sauce over the frozen vanilla layer. Sprinkle the buttered cookie crumbs evenly over the fudge, then lightly press them down. Pour the remaining fudge sauce over the crumbs to lock them in. Return the pan to the freezer for at least 45 minutes until the center is solid.
- Softened the chocolate ice cream just like you did with the vanilla. Once the crunch layer is firm, spread the chocolate ice cream over the top, smoothing it out to the edges. Cover the pan tightly with plastic wrap or foil. Freeze the cake for at least 6 hours, or preferably overnight, to ensure it is completely solid throughout.
- When you are ready to serve, remove the cake from the freezer. Release the sides of the springform pan and lift the cake out using the plastic wrap overhang. Peel away the plastic and place the cake on a serving plate. Spread the whipped topping over the top and sides of the cake. Garnish with sprinkles or extra cookie crumbs if desired. Let the cake sit at room temperature for 5-10 minutes before slicing to make it easier to cut.
- Cook Time: 50 minutes