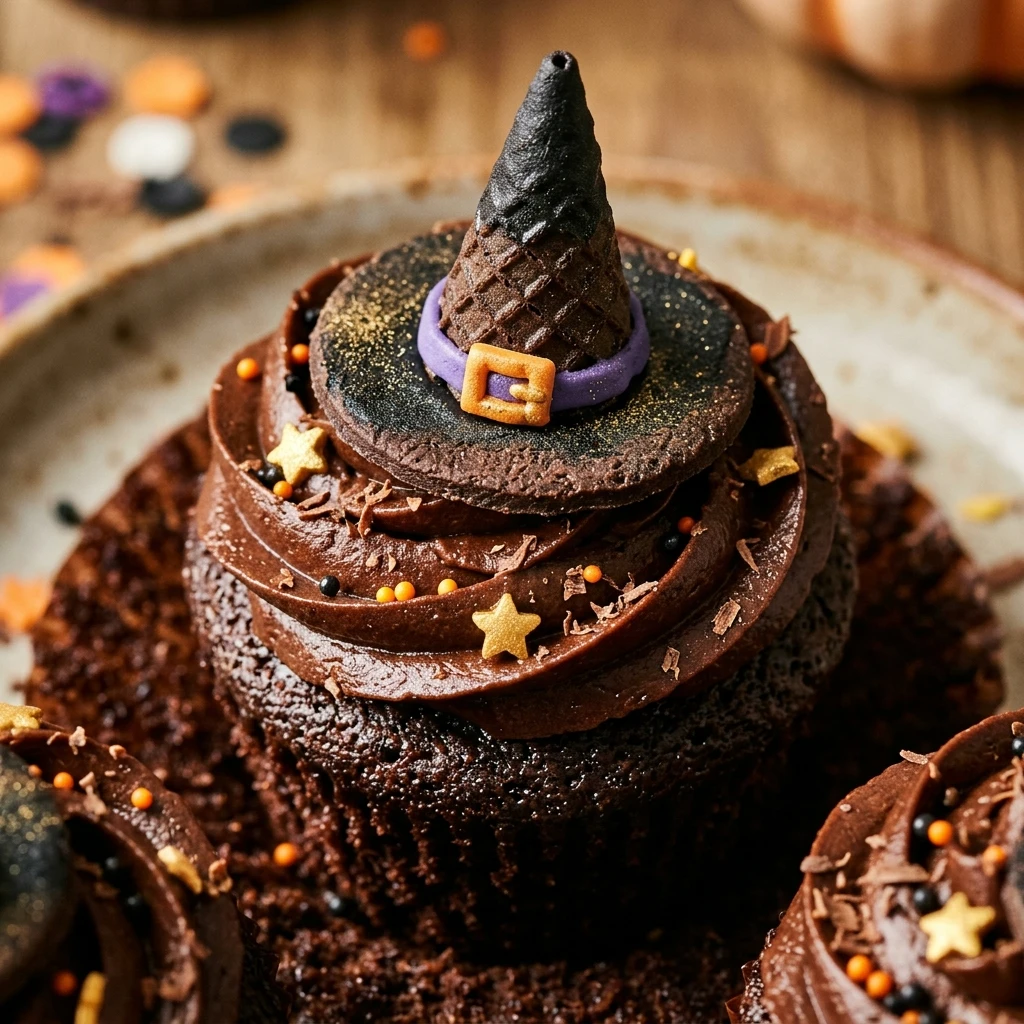
Halloween is the perfect time to get creative in the kitchen, and nothing says “spooky season” quite like a batch of Witch Hat Chocolate Cupcakes. These adorable treats combine rich, moist chocolate cake with a whimsical topper that looks like it belongs in a magical forest. Whether you are hosting a neighborhood bash or looking for a fun weekend activity with the kids, these cupcakes are guaranteed to be the star of the dessert table. They look professionally made but are surprisingly simple to assemble, making them a must-have for your October baking list.
Recipe Information
- Prep Time: 30 minutes
- Cook Time: 20 minutes
- Total Time: 50 minutes
- Servings: 12 cupcakes
- Difficulty: Medium
Nutrition values
- Calories: 385 kcal
- Protein: 4g
- Carbs: 54g
Why Make This Witch Hat Chocolate Cupcakes Halloween Recipe
These cupcakes are the ultimate crowd-pleaser for several reasons. First, the visual impact is incredible; the “hats” made from cookies and candies create a 3D effect that kids and adults adore. Second, the flavor profile is a chocolate lover’s dream, featuring a deep cocoa base and smooth buttercream. Finally, this recipe is highly customizable. You can change the “ribbon” color on the hat to match your party theme, making it a versatile addition to any Halloween celebration.
Ingredients
For the Cupcakes:
- 1 ½ cups all-purpose flour
- 1 cup granulated sugar
- 1/3 cup unsweetened cocoa powder
- 1 teaspoon baking soda
- ½ teaspoon salt
- 1 cup warm water
- 1/3 cup vegetable oil
- 1 teaspoon vanilla extract
- 1 teaspoon distilled white vinegar
For the Toppers and Frosting:
- 2 cups chocolate buttercream frosting
- 12 chocolate sandwich cookies (like Oreos)
- 12 unwrapped Hershey’s Kisses
- 1 tube of orange decorating icing (with a small round tip)
- Green or purple sprinkles (optional)
Directions
Step 1: Preparation and Baking
Preheat your oven to 350°F (175°C) and line a 12-cup muffin tin with paper liners. In a large bowl, whisk together the flour, sugar, cocoa powder, baking soda, and salt. Add the water, oil, vanilla, and vinegar. Stir until the batter is smooth and no lumps remain. Divide the batter evenly among the liners, filling each about two-thirds full. Bake for 18 to 20 minutes or until a toothpick inserted into the center comes out clean. Let the cupcakes cool completely on a wire rack before frosting.
Step 2: Frosting the Cupcake Base
Once the cupcakes are cold to the touch, apply a generous layer of chocolate frosting to the top of each. You can use a piping bag for a clean look or a butter knife for a rustic, “muddy” appearance. If you want extra texture, dip the edges of the frosted cupcakes into festive green or purple sprinkles to create a “grass” or “magic” effect around the base of the hat.
Step 3: Constructing the Witch Hats
Take your chocolate sandwich cookies and gently twist them apart, scraping away the cream filling (or just use the whole cookie for a thicker brim). Place one cookie flat on your work surface. Pipe a small dot of orange icing onto the flat bottom of a Hershey’s Kiss. Press the candy firmly onto the center of the cookie. The icing acts as glue. Repeat this for all 12 hats and let them sit for 5 minutes to set.
Step 4: Final Assembly and Detailing
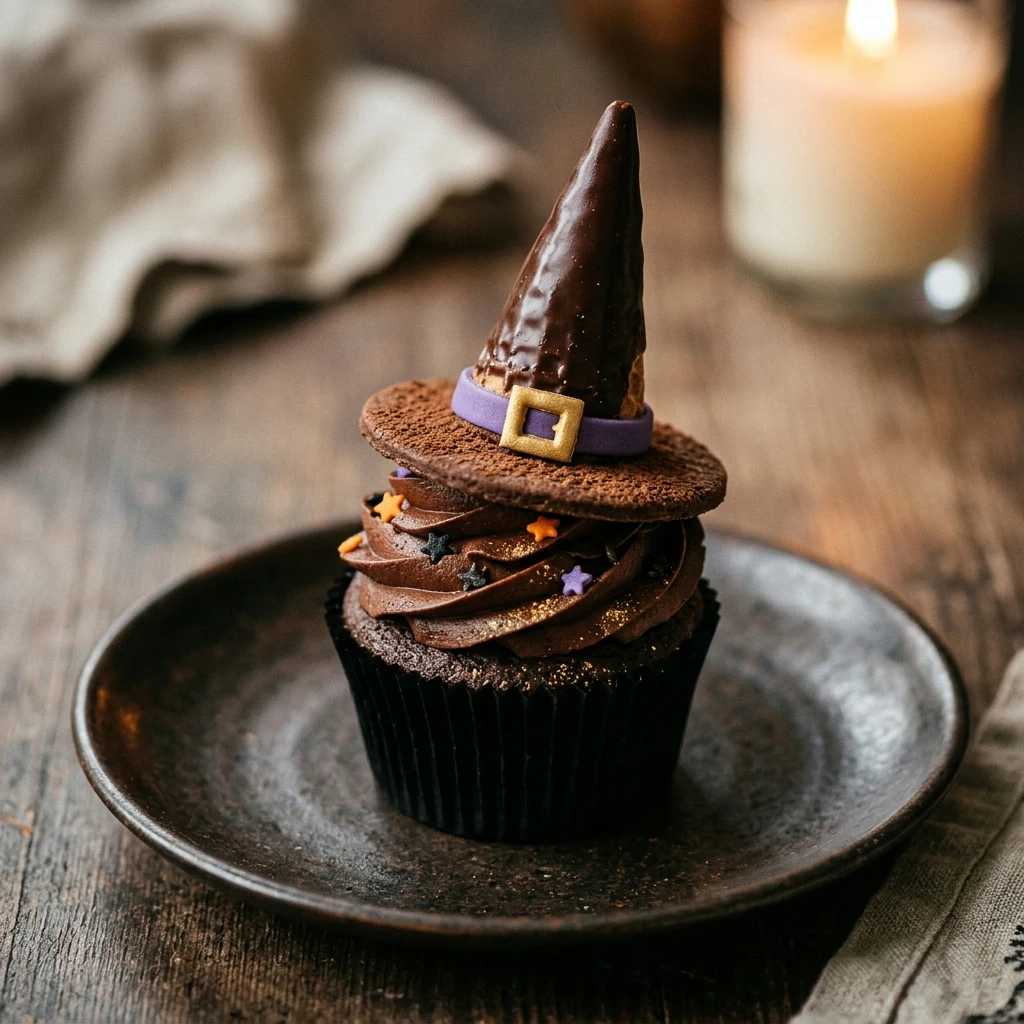
Carefully place one assembled witch hat onto the center of each frosted cupcake. Press down slightly so it sticks to the cupcake frosting. Use the orange decorating icing to pipe a thin “ribbon” around the base of the Hershey’s Kiss where it meets the cookie. You can even pipe a tiny square to look like a buckle. Your Witch Hat Chocolate Cupcakes are now ready to serve!
Expert Tips for Perfect Witch Hat Chocolate Cupcakes Halloween Recipe
For the best results, always ensure your cupcakes are completely cool before you start decorating. If the cake is even slightly warm, the frosting will melt, and your witch hats will slide right off. When assembling the hats, use a very small amount of “glue” icing so it doesn’t ooze out too much. If you want a more intense chocolate flavor, swap the warm water in the batter for hot brewed coffee; it enhances the cocoa without making the cake taste like coffee.
Delicious Variations
You can easily put a spin on this classic recipe. Instead of chocolate frosting, use bright green “slime” frosting by adding food coloring to vanilla buttercream. For the hat base, try using chocolate wafers or even thin mint cookies for a different flavor profile. If you want a “Good Witch” version, use white chocolate Kisses and pink decorating icing. You can also hide a “surprise” inside the cupcake by coring the center and filling it with orange sprinkles before frosting.
Frequently Asked Questions
Can I make these cupcakes in advance?
Yes! You can bake the cupcakes a day ahead and store them in an airtight container. However, I recommend assembling the cookie hats on the day of serving to ensure the cookies stay crisp.
What is the best way to store leftovers?
Store the cupcakes in a single layer in an airtight container at room temperature for up to two days. If your kitchen is very warm, keep them in the refrigerator, but let them reach room temperature before eating for the best texture.
Can I use a boxed cake mix instead?
Absolutely. If you are short on time, use your favorite boxed chocolate cake mix and follow the package instructions. The magic is really in the witch hat decoration!
Why did my Hershey’s Kiss fall off the cookie?
This usually happens if the icing “glue” hasn’t set or if you used a gel-based icing that stays slippery. Use a stiff buttercream or royal icing for the best hold.
How do I transport these without the hats falling over?
Use a deep cupcake carrier. Ensure the hats are firmly pressed into the cupcake frosting. If you are traveling a long distance, you may want to bring the hats in a separate container and place them on the cupcakes once you arrive.
Conclusion
Witch Hat Chocolate Cupcakes are the perfect blend of spooky and sweet. They offer a delightful crunch from the cookie brim and a smooth melt-in-your-mouth finish from the chocolate candy. By following these simple steps, you can create a professional-looking dessert that captures the spirit of Halloween. Gather your ingredients, summon your inner baker, and get ready to impress every ghost and ghoul at your next holiday gathering!
Witch Hat Chocolate Cupcakes Halloween Recipe
- Total Time: 50 minutes
- Diet: Vegetarian
Ingredients
- 1 ½ cups all-purpose flour
- 1 cup granulated sugar
- 1/3 cup unsweetened cocoa powder
- 1 teaspoon baking soda
- ½ teaspoon salt
- 1 cup warm water
- 1/3 cup vegetable oil
- 1 teaspoon vanilla extract
- 1 teaspoon distilled white vinegar
- 2 cups chocolate buttercream frosting
- 12 chocolate sandwich cookies (like Oreos)
- 12 unwrapped Hershey’s Kisses
- 1 tube of orange decorating icing (with a small round tip)
- Green or purple sprinkles (optional)
Instructions
- Preheat your oven to 350°F (175°C) and line a 12-cup muffin tin with paper liners. In a large bowl, whisk together the flour, sugar, cocoa powder, baking soda, and salt. Add the water, oil, vanilla, and vinegar. Stir until the batter is smooth and no lumps remain. Divide the batter evenly among the liners, filling each about two-thirds full. Bake for 18 to 20 minutes or until a toothpick inserted into the center comes out clean. Let the cupcakes cool completely on a wire rack before frosting.
- Once the cupcakes are cold to the touch, apply a generous layer of chocolate frosting to the top of each. You can use a piping bag for a clean look or a butter knife for a rustic, “muddy” appearance. If you want extra texture, dip the edges of the frosted cupcakes into festive green or purple sprinkles to create a “grass” or “magic” effect around the base of the hat.
- Take your chocolate sandwich cookies and gently twist them apart, scraping away the cream filling (or just use the whole cookie for a thicker brim). Place one cookie flat on your work surface. Pipe a small dot of orange icing onto the flat bottom of a Hershey’s Kiss. Press the candy firmly onto the center of the cookie. The icing acts as glue. Repeat this for all 12 hats and let them sit for 5 minutes to set.
- Carefully place one assembled witch hat onto the center of each frosted cupcake. Press down slightly so it sticks to the cupcake frosting. Use the orange decorating icing to pipe a thin “ribbon” around the base of the Hershey’s Kiss where it meets the cookie. You can even pipe a tiny square to look like a buckle. Your Witch Hat Chocolate Cupcakes are now ready to serve!
- Cook Time: 50 minutes