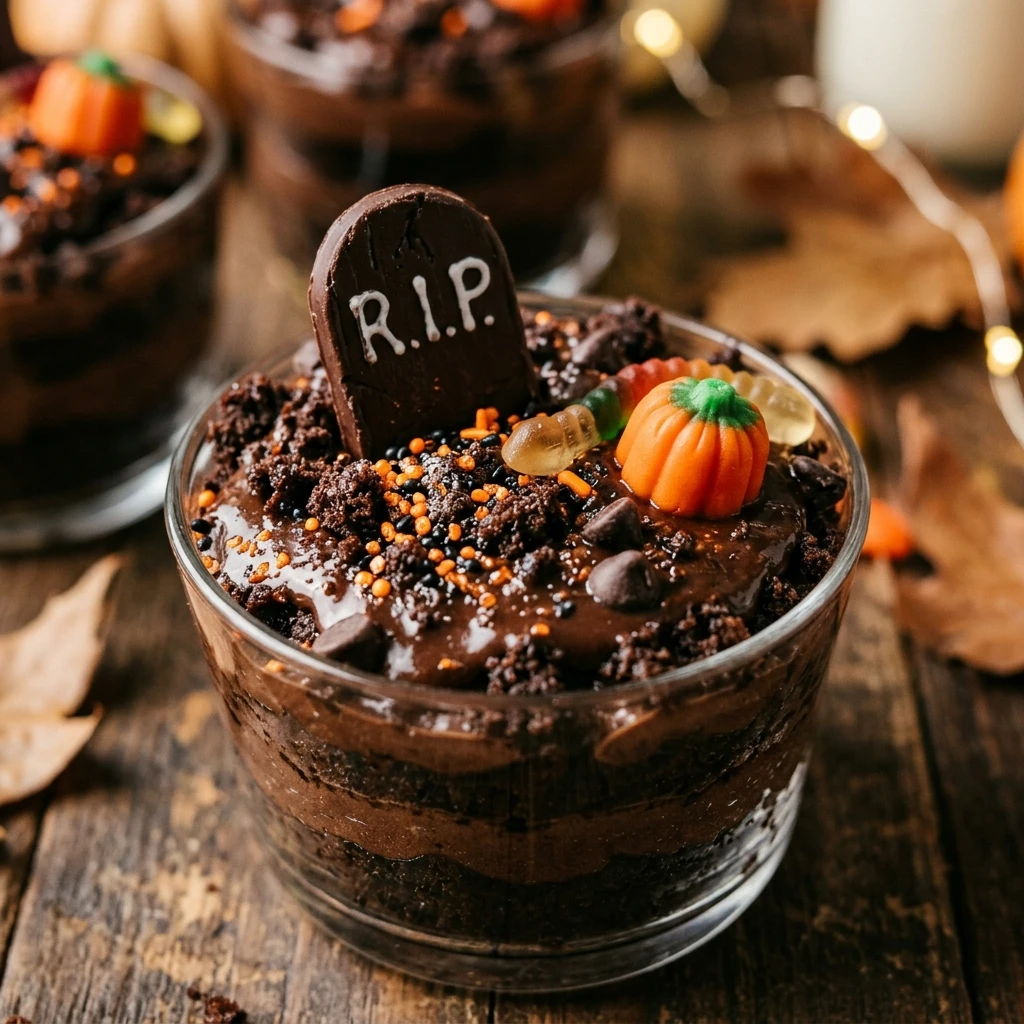
Get ready to thrill your guests with the ultimate spooky treat this October! These Spooky Halloween Brownie Graveyard Cups are the perfect blend of rich, fudgy chocolate and playful, eerie decorations. Whether you are hosting a haunted house party or looking for a fun kitchen project to do with the kids, these individual dessert cups are guaranteed to be a hit. They look like mini graveyards complete with edible dirt, tombstone cookies, and creepy-crawly gummy worms. Best of all, they are incredibly easy to assemble, leaving you more time to focus on your costume!
Recipe Information
- Prep Time: 20 minutes
- Cook Time: 25 minutes
- Total Time: 45 minutes
- Servings: 12 servings
- Difficulty: Easy
Nutrition values
- Calories: 310 kcal
- Protein: 4g
- Carbs: 42g
Why Make This Spooky Halloween Brownie Graveyard Cups Recipe
This recipe is a must-have for your Halloween repertoire because it combines convenience with high-impact presentation. You can use your favorite boxed brownie mix to save time, or go fully homemade if you prefer. These cups are perfectly portioned for parties, meaning no messy slicing or serving plates required. Plus, the layers of textures—from the chewy brownie base to the creamy pudding and crunchy cookie “dirt”—make every bite a delight. It is a highly customizable dessert that allows you to get creative with your decorations, making each cup a unique little scene of festive horror.
Ingredients
- 1 box (18 oz) chocolate brownie mix (plus eggs, oil, and water as required by the box)
- 1 package (3.9 oz) instant chocolate pudding mix
- 2 cups cold milk
- 15 chocolate sandwich cookies (like Oreos), crushed into fine crumbs
- 12 Milano cookies (to serve as tombstones)
- Black decorating icing or an edible ink marker
- 12-24 gummy worms
- Candy pumpkins or candy bones for garnish
- 12 clear plastic or glass serving cups (9 oz size)
Directions
Step 1: Bake the Brownie Base
Preheat your oven according to the brownie mix instructions. Prepare the brownie batter in a medium bowl by combining the mix, eggs, oil, and water. Pour the batter into a greased baking pan and bake until a toothpick comes out with just a few moist crumbs. Once finished, remove the brownies from the oven and let them cool completely. Once cool, cut or crumble the brownies into small, bite-sized pieces.
Step 2: Prepare the Pudding and Dirt
In a separate bowl, whisk together the instant chocolate pudding mix and the cold milk for about two minutes until thickened. Set it aside in the refrigerator for 5 minutes to firm up. While the pudding sets, place your chocolate sandwich cookies in a plastic bag and crush them with a rolling pin until they resemble fine potting soil.
Step 3: Decorate the Tombstones
Take your Milano cookies and use the black decorating icing or edible marker to write “R.I.P.” or draw small crosses on the top half of each cookie. Set these aside for a few minutes to allow the icing to dry or set so they don’t smudge during assembly.
Step 4: Assemble the Graveyard Layers
Take your clear serving cups and place a generous layer of brownie crumbles at the bottom of each. Follow this with a thick layer of the chocolate pudding. Sprinkle a heavy layer of the crushed cookie “dirt” over the pudding until it completely covers the surface.
Step 5: Final Spooky Decorations
Press one decorated Milano cookie tombstone into the back of each cup so it stands upright. Tuck one or two gummy worms into the “dirt” so they look like they are crawling out of the grave. Add a candy pumpkin or a few candy bones to the side for extra flair. Serve immediately or chill until party time.
Expert Tips for Perfect Spooky Halloween Brownie Graveyard Cups Recipe
To ensure your graveyard cups look professional, use a piping bag to add the pudding layer; this keeps the sides of the cups clean and prevents smearing. If you want a richer flavor, swap the water in your brownie mix for brewed coffee to enhance the chocolate. Always wait for the brownies to be completely cool before assembling, otherwise, the heat will melt your pudding and make the “dirt” soggy. For the best “dirt” texture, make sure to remove the cream filling from the sandwich cookies before crushing them, though leaving it in works fine for a sweeter, chunkier look.
Delicious Variations
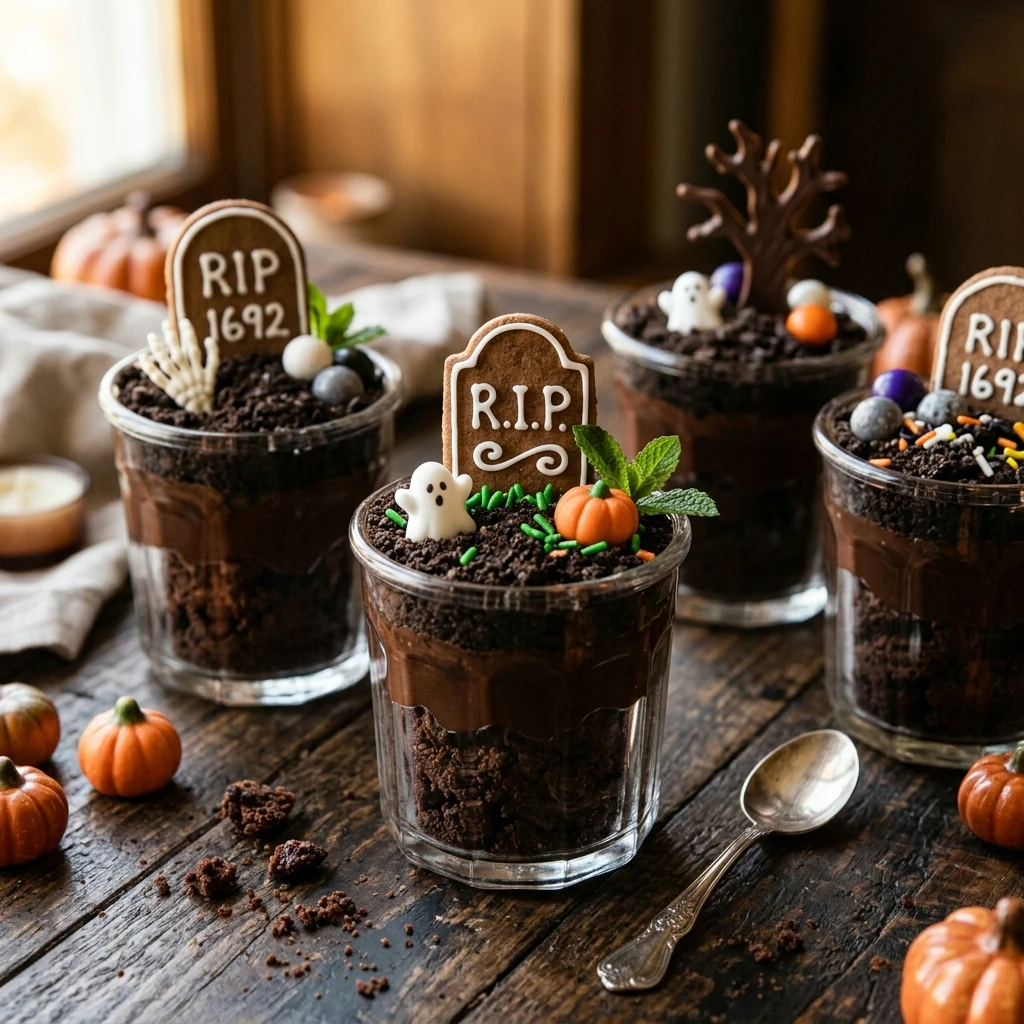
You can easily put a twist on this classic recipe. Try using white chocolate pudding tinted with green food coloring to look like “toxic slime” instead of brown earth. For a minty version, use mint-filled chocolate cookies and add a drop of peppermint extract to the brownie batter. If you want a more “grown-up” version, you can soak the brownie pieces in a little bit of coffee liqueur or Irish cream before layering. For a gluten-free option, simply use a gluten-free brownie mix and gluten-free chocolate sandwich cookies.
Frequently Asked Questions
Can I make these graveyard cups in advance?
Yes, you can assemble the brownie and pudding layers up to 24 hours in advance. However, wait to add the cookie “dirt,” tombstones, and gummy worms until shortly before serving to prevent the cookies from getting soft.
How should I store leftover cups?
Store any leftovers in the refrigerator, covered with plastic wrap, for up to 3 days. Note that the cookie components will lose their crunch over time.
What can I use if I can’t find Milano cookies?
Any oval or rectangular biscuit will work! Nutter Butters or even plain graham crackers cut into rectangles make excellent tombstones.
Can I use chocolate mousse instead of pudding?
Absolutely! Chocolate mousse provides a lighter, airier texture that works wonderfully with the dense brownies and crunchy cookies.
Are these suitable for a kids’ school party?
Yes, they are very kid-friendly. Just ensure you use disposable plastic cups if they are being transported to a school or community event for easy cleanup.
Conclusion
These Spooky Halloween Brownie Graveyard Cups are the ultimate festive treat that combines ease of preparation with a truly impressive look. They capture the spirit of the season in every delicious layer, making them a centerpiece of any Halloween dessert table. Whether you follow the recipe exactly or add your own ghostly flair, these cups are sure to bring smiles and satisfy any chocolate craving. Happy Halloween and enjoy your spooky snacking!

Spooky Halloween Brownie Graveyard Cups Recipe
- Total Time: 45 minutes
- Diet: Vegetarian
Ingredients
- 1 box (18 oz) chocolate brownie mix (plus eggs, oil, and water as required by the box)
- 1 package (3.9 oz) instant chocolate pudding mix
- 2 cups cold milk
- 15 chocolate sandwich cookies (like Oreos), crushed into fine crumbs
- 12 Milano cookies (to serve as tombstones)
- Black decorating icing or an edible ink marker
- 12–24 gummy worms
- Candy pumpkins or candy bones for garnish
- 12 clear plastic or glass serving cups (9 oz size)
Instructions
- Preheat your oven according to the brownie mix instructions. Prepare the brownie batter in a medium bowl by combining the mix, eggs, oil, and water. Pour the batter into a greased baking pan and bake until a toothpick comes out with just a few moist crumbs. Once finished, remove the brownies from the oven and let them cool completely. Once cool, cut or crumble the brownies into small, bite-sized pieces.
- In a separate bowl, whisk together the instant chocolate pudding mix and the cold milk for about two minutes until thickened. Set it aside in the refrigerator for 5 minutes to firm up. While the pudding sets, place your chocolate sandwich cookies in a plastic bag and crush them with a rolling pin until they resemble fine potting soil.
- Take your Milano cookies and use the black decorating icing or edible marker to write “R.I.P.” or draw small crosses on the top half of each cookie. Set these aside for a few minutes to allow the icing to dry or set so they don’t smudge during assembly.
- Take your clear serving cups and place a generous layer of brownie crumbles at the bottom of each. Follow this with a thick layer of the chocolate pudding. Sprinkle a heavy layer of the crushed cookie “dirt” over the pudding until it completely covers the surface.
- Press one decorated Milano cookie tombstone into the back of each cup so it stands upright. Tuck one or two gummy worms into the “dirt” so they look like they are crawling out of the grave. Add a candy pumpkin or a few candy bones to the side for extra flair. Serve immediately or chill until party time.
- Cook Time: 45 minutes