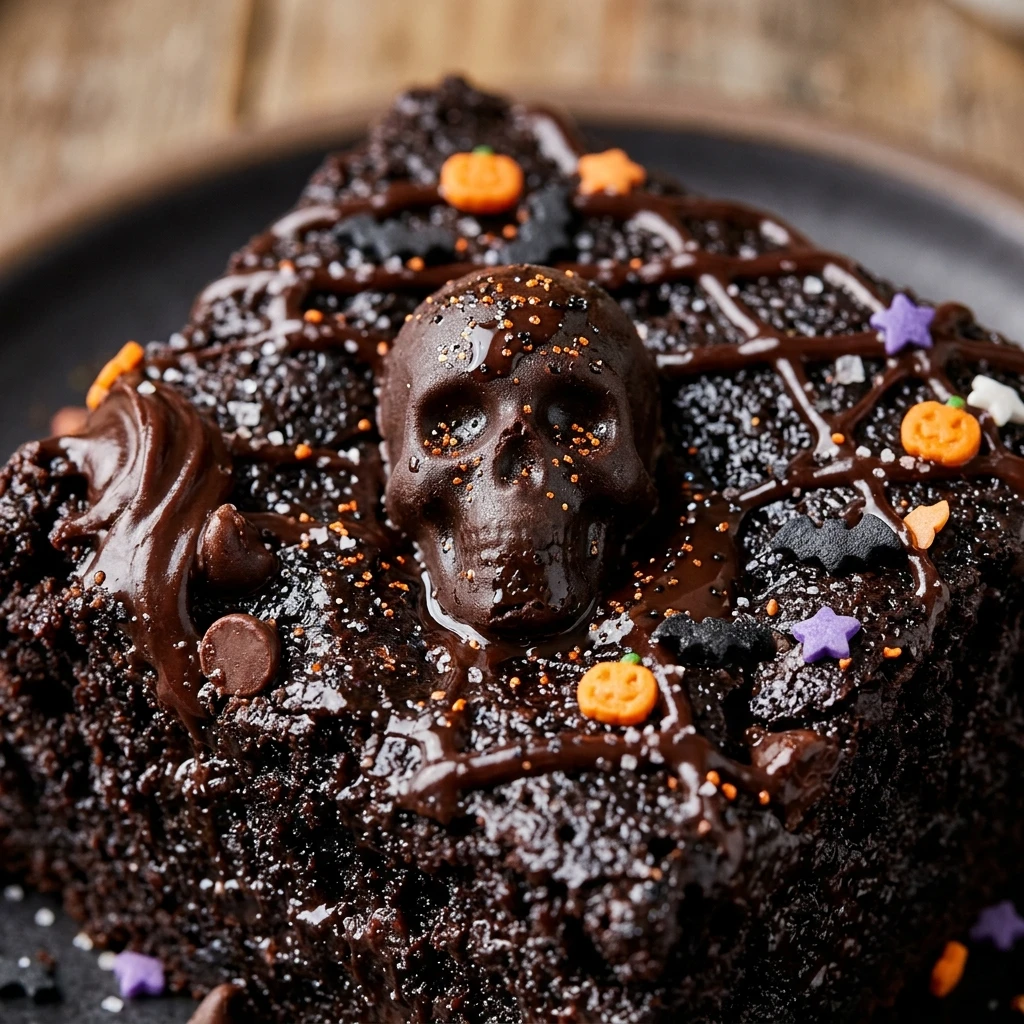
Forget the orange and black streamers; the real star of your next October bash is a tray of these Spooky Black Velvet Brownies. These brownies aren’t just dark—they are “midnight in a haunted forest” dark. Achieving that deep, dramatic hue without a drop of food coloring is the secret to their sophisticated yet eerie charm. They offer a rich, decadent chocolate flavor that hits differently than your standard cocoa treat. Whether you are hosting a monster mash or just want a moody snack for a horror movie marathon, these fudgy, velvet-textured squares are the ultimate Halloween indulgence.
Recipe Information
- Prep Time: 15 minutes
- Cook Time: 30 minutes
- Total Time: 45 minutes
- Servings: 16 brownies
- Difficulty: Easy
Nutrition values
- Calories: 210 kcal
- Protein: 3g
- Carbs: 28g
Why Make This Spooky Black Velvet Brownies Halloween Dessert
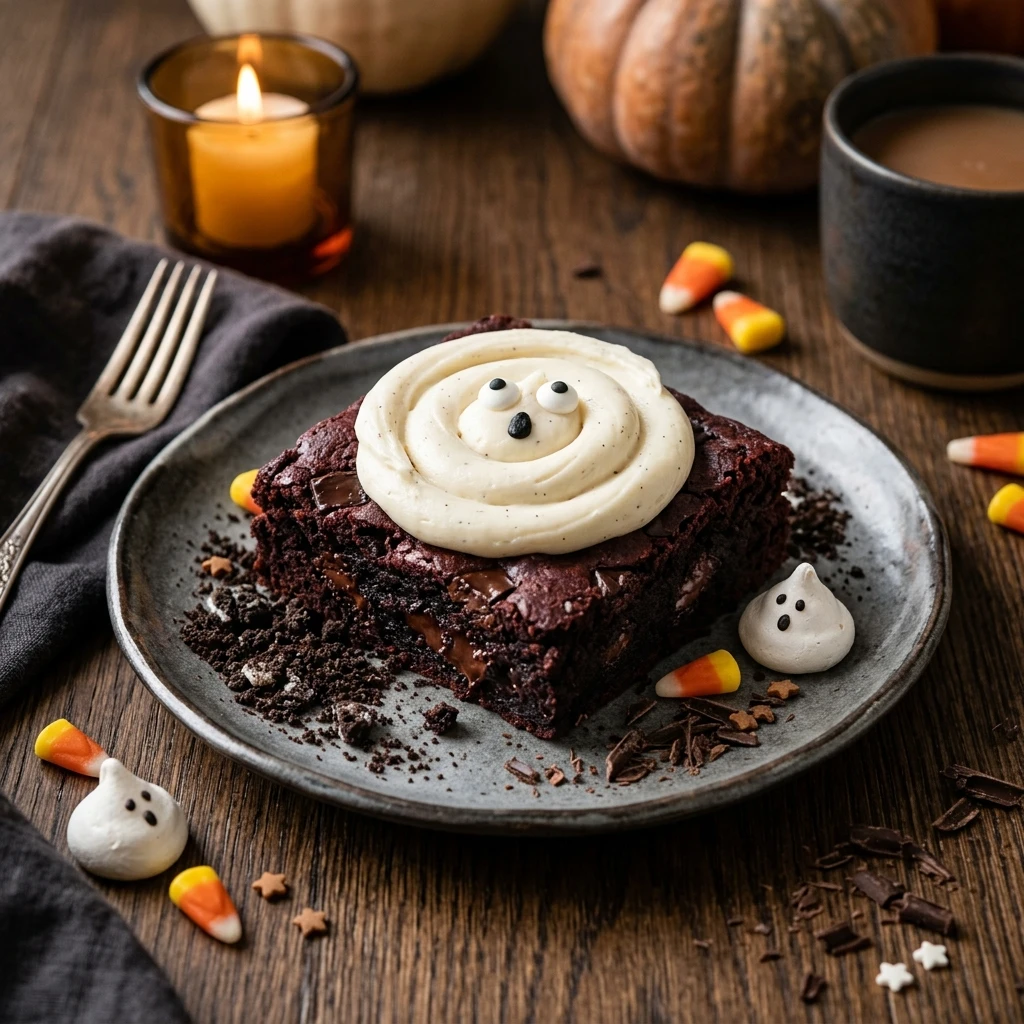
These brownies are a showstopper for several reasons. First, the use of black cocoa powder creates a striking visual contrast, especially when topped with white candy eyes or vibrant sprinkles. Second, the texture is incredibly fudgy and dense, sitting perfectly between a cake and a truffle. Unlike traditional brownies, the “black velvet” style has a slightly more complex, earthy chocolate flavor that pairs beautifully with a glass of cold milk. Best of all, they are incredibly easy to whip up in one bowl, leaving you more time to work on your costume!
Ingredients
- 1/2 cup unsalted butter, melted and slightly cooled
- 1 cup granulated sugar
- 2 large eggs, room temperature
- 1 teaspoon pure vanilla extract
- 1/2 cup black cocoa powder (highly alkalized)
- 1/2 cup all-purpose flour
- 1/4 teaspoon salt
- 1/2 cup semi-sweet chocolate chips (optional)
- Candy eyeballs or Halloween-themed sprinkles for decoration
Directions
Step 1: Preparation
Preheat your oven to 350°F (175°C). Line an 8×8-inch square baking pan with parchment paper, leaving an overhang on the sides. This “sling” allows you to lift the brownies out easily once they have cooled. Lightly grease the parchment with butter or non-stick cooking spray to ensure nothing sticks.
Step 2: Mixing the Wet Ingredients
In a large mixing bowl, whisk together the melted butter and granulated sugar until the mixture is well combined and slightly grainy. Add the eggs one at a time, whisking vigorously after each addition. Stir in the vanilla extract. The mixture should look glossy and smooth before you move on to the dry ingredients.
Step 3: Incorporating the Dry Ingredients
Sift the black cocoa powder, all-purpose flour, and salt directly into the wet mixture. Using a rubber spatula, gently fold the dry ingredients into the batter. Do not overmix; stop as soon as no white streaks of flour remain. If you are using chocolate chips, fold them in now. The batter will be very thick and dark.
Step 4: Baking
Spread the batter evenly into the prepared baking pan, smoothing the top with your spatula. Place the pan in the center rack of the oven and bake for 25 to 30 minutes. To check for doneness, insert a toothpick into the center; it should come out with a few moist crumbs attached, but not wet batter. Avoid overbaking to keep that fudgy texture.
Step 5: Decorating and Cooling
Remove the pan from the oven. While the brownies are still warm, gently press your candy eyeballs or Halloween sprinkles into the top so they stick. Let the brownies cool completely in the pan on a wire rack. Once cooled, use the parchment paper sling to lift them out and slice them into 16 squares using a sharp, warm knife.
Expert Tips for Perfect Spooky Black Velvet Brownies Halloween Dessert
To get that signature jet-black color, you must use Black Cocoa Powder. Regular Dutch-processed cocoa is dark, but black cocoa (the kind used in Oreo cookies) provides the deep midnight hue and unique flavor. Another tip is to avoid over-whisking once you add the flour; over-mixing develops gluten, which makes the brownies tough rather than fudgy. Lastly, always use room-temperature eggs to ensure they emulsify perfectly with the melted butter, resulting in a crackly, shiny top.
Delicious Variations
- Cream Cheese Spiderweb: Swirl a sweetened cream cheese mixture over the top before baking to create a spooky white-on-black marbled effect.
- Peanut Butter Grave: Add dollops of peanut butter into the batter and swirl them with a toothpick for a “dirt and mud” look.
- Salted Caramel Ghoul: Drizzle salted caramel sauce over the cooled brownies to add a rich, buttery layer of flavor.
- Gluten-Free Version: Swap the all-purpose flour for a 1:1 gluten-free baking blend; the black cocoa still provides excellent structure.
Frequently Asked Questions
What does black cocoa taste like?
Black cocoa has a very smooth, non-acidic chocolate flavor. It tastes remarkably like the wafer part of an Oreo cookie. It is less sweet than traditional cocoa, which is why we balance it with a full cup of sugar.
Can I use regular cocoa powder instead?
Yes, you can use regular Dutch-processed cocoa powder, but the brownies will be a standard brown color rather than the “black velvet” look. The flavor will also be more like a traditional brownie.
How do I store these brownies?
Store your brownies in an airtight container at room temperature for up to 4 days. If you prefer them extra chewy, you can store them in the refrigerator for up to a week.
Can I freeze black velvet brownies?
Absolutely! Wrap individual squares tightly in plastic wrap and place them in a freezer-safe bag. They will stay fresh for up to 3 months. Thaw at room temperature before eating.
How do I get clean cuts when slicing?
Wait for the brownies to cool completely—or even chill them in the fridge for an hour. Use a large, sharp knife and wipe it clean with a warm, damp cloth between every single cut. This prevents crumbs from dragging through the squares.
Conclusion
These Spooky Black Velvet Brownies are the perfect combination of eerie aesthetics and delicious indulgence. With their deep dark color and fudgy center, they are guaranteed to disappear faster than a ghost at sunrise. Give this recipe a try this Halloween season and watch your guests marvel at the dramatic, delicious results. Happy baking and stay spooky!
Spooky Black Velvet Brownies Halloween Dessert
- Total Time: 45 minutes
- Diet: Vegetarian
Ingredients
- 1/2 cup unsalted butter, melted and slightly cooled
- 1 cup granulated sugar
- 2 large eggs, room temperature
- 1 teaspoon pure vanilla extract
- 1/2 cup black cocoa powder (highly alkalized)
- 1/2 cup all-purpose flour
- 1/4 teaspoon salt
- 1/2 cup semi-sweet chocolate chips (optional)
- Candy eyeballs or Halloween-themed sprinkles for decoration
Instructions
- Preheat your oven to 350°F (175°C). Line an 8×8-inch square baking pan with parchment paper, leaving an overhang on the sides. This “sling” allows you to lift the brownies out easily once they have cooled. Lightly grease the parchment with butter or non-stick cooking spray to ensure nothing sticks.
- In a large mixing bowl, whisk together the melted butter and granulated sugar until the mixture is well combined and slightly grainy. Add the eggs one at a time, whisking vigorously after each addition. Stir in the vanilla extract. The mixture should look glossy and smooth before you move on to the dry ingredients.
- Sift the black cocoa powder, all-purpose flour, and salt directly into the wet mixture. Using a rubber spatula, gently fold the dry ingredients into the batter. Do not overmix; stop as soon as no white streaks of flour remain. If you are using chocolate chips, fold them in now. The batter will be very thick and dark.
- Spread the batter evenly into the prepared baking pan, smoothing the top with your spatula. Place the pan in the center rack of the oven and bake for 25 to 30 minutes. To check for doneness, insert a toothpick into the center; it should come out with a few moist crumbs attached, but not wet batter. Avoid overbaking to keep that fudgy texture.
- Remove the pan from the oven. While the brownies are still warm, gently press your candy eyeballs or Halloween sprinkles into the top so they stick. Let the brownies cool completely in the pan on a wire rack. Once cooled, use the parchment paper sling to lift them out and slice them into 16 squares using a sharp, warm knife.
- Cook Time: 45 minutes