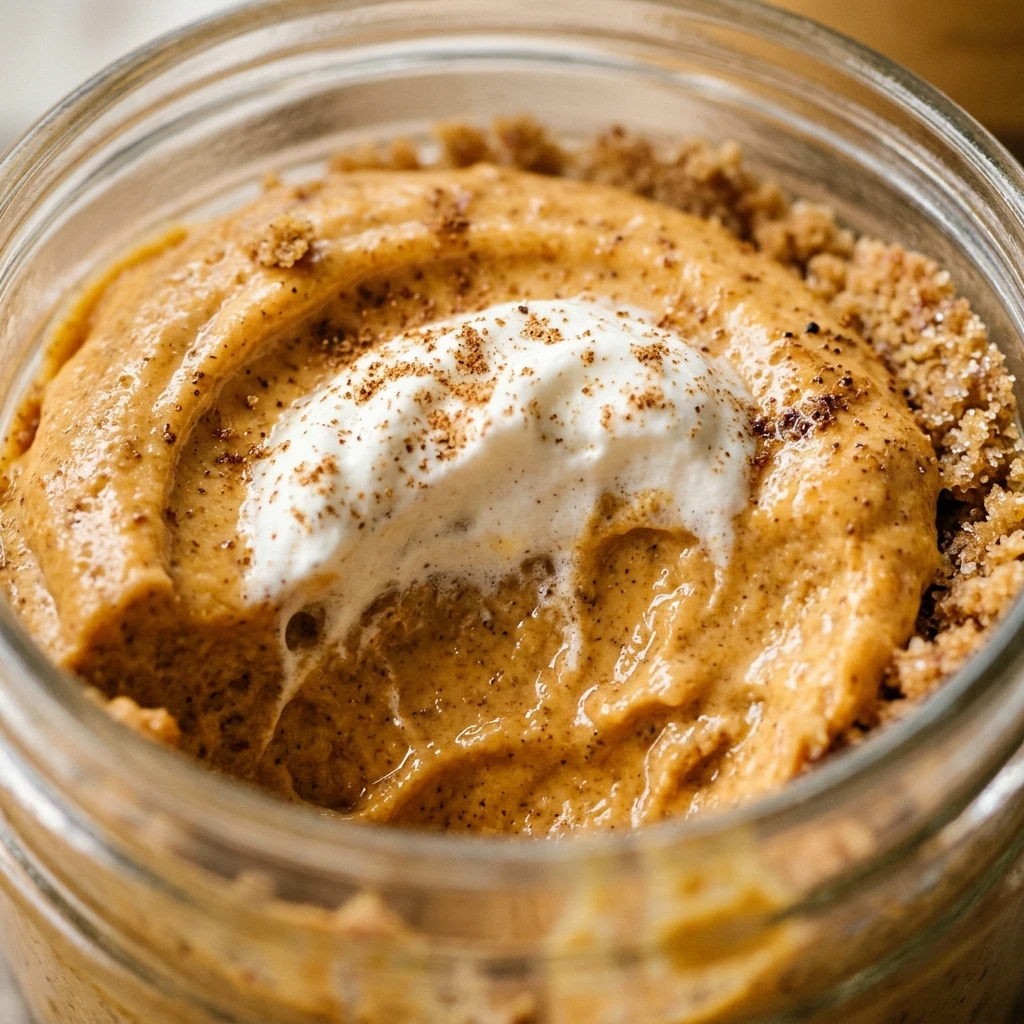
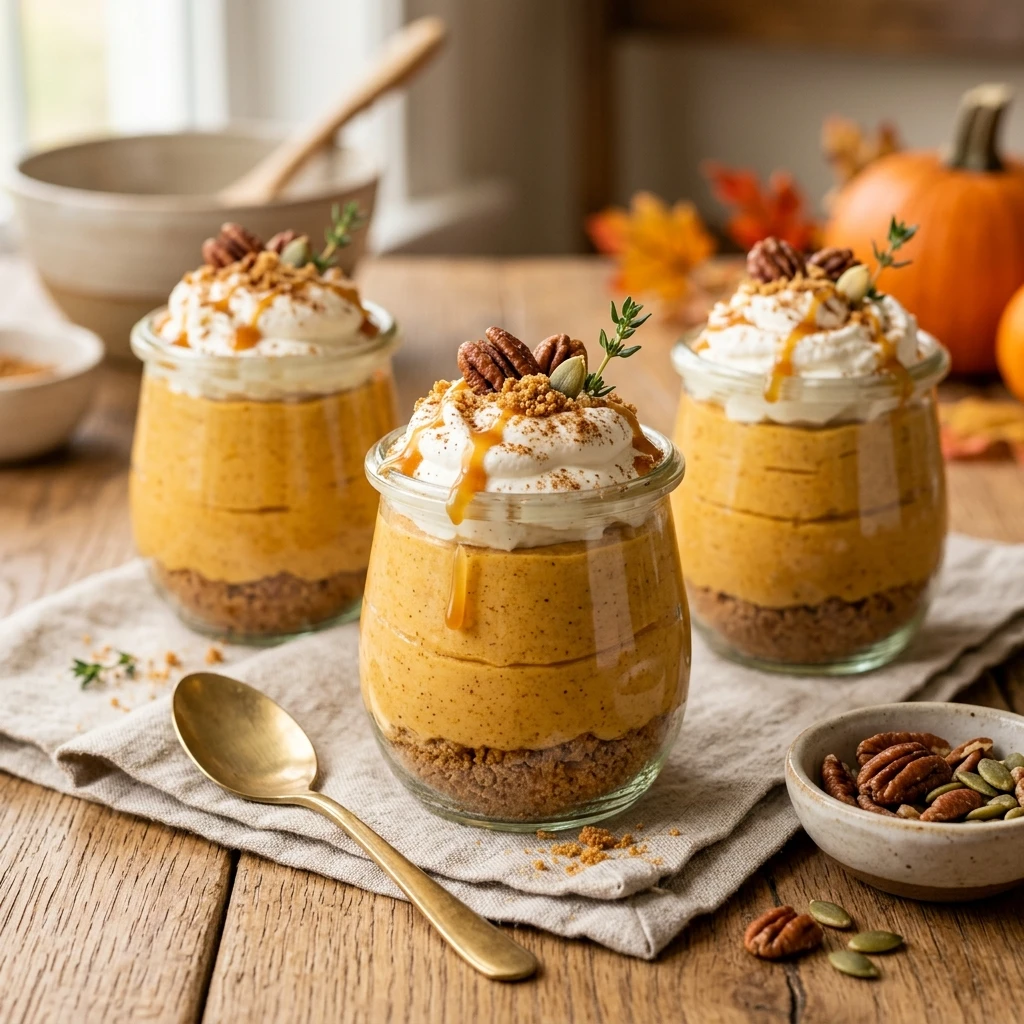
Fall is officially in the air, and there is no better way to celebrate the season than with a dessert that requires zero time in the oven. These No Bake Pumpkin Cheesecake Jars are the ultimate autumn treat, combining the silky texture of classic cheesecake with the warm, cozy spices of a traditional pumpkin pie. By serving them in individual jars, you create a beautiful presentation that is perfect for dinner parties, holiday gatherings, or just a quiet night in. They are light, fluffy, and incredibly easy to assemble, making them a go-to recipe when you want maximum flavor with minimal effort.
Recipe Information
- Prep Time: 25 minutes
- Cook Time: 0 minutes
- Total Time: 25 minutes
- Servings: 6 servings
- Difficulty: Easy
Nutrition values
- Calories: 385 kcal
- Protein: 5g
- Carbs: 42g
Why Make This No Bake Pumpkin Cheesecake Jars
This recipe is a lifesaver during the busy holiday season. Because these jars require no baking, you save precious oven space for the turkey or side dishes. The individual portions make serving a breeze—no messy slicing or crumbly crusts to deal with. Additionally, the texture is much lighter than a baked cheesecake, offering a mousse-like consistency that feels indulgent without being overly heavy. You can easily prep these a day in advance, allowing the flavors to meld and the filling to set perfectly while you focus on other tasks.
Ingredients
- 1 ½ cups graham cracker crumbs
- 4 tablespoons unsalted butter, melted
- 1 tablespoon brown sugar
- 8 ounces cream cheese, softened to room temperature
- 1 cup pumpkin puree (not pumpkin pie filling)
- ½ cup powdered sugar
- 1 teaspoon vanilla extract
- 1 ½ teaspoons pumpkin pie spice
- 1 ½ cups heavy whipping cream (or 2 cups whipped topping)
- Optional: Whipped cream and pecans for garnish
Directions
Step 1: Prepare the Graham Cracker Crust
In a medium bowl, combine the graham cracker crumbs, melted butter, and brown sugar. Stir until the mixture looks like wet sand. Distribute the mixture evenly among six small jars or ramekins. Use a small spoon or the end of a cocktail muddler to press the crumbs firmly into the bottom of each jar. Set the jars aside while you prepare the filling.
Step 2: Whip the Cream
In a chilled mixing bowl, beat the heavy whipping cream until stiff peaks form. If you are using pre-made whipped topping, you can skip this step. Be careful not to over-beat the cream, or it will turn into butter. Once it is light and airy, set it aside in the refrigerator to keep it cold.
Step 3: Mix the Cheesecake Base
In a large mixing bowl, beat the softened cream cheese and powdered sugar together until the mixture is completely smooth and lump-free. Add the pumpkin puree, vanilla extract, and pumpkin pie spice. Continue beating on medium speed until the color is uniform and the ingredients are well incorporated. Scrape down the sides of the bowl to ensure everything is mixed.
Step 4: Fold and Assemble
Gently fold the whipped cream into the pumpkin mixture using a spatula. Use a slow “under-and-over” motion to keep the filling airy. Once combined, spoon or pipe the filling into the prepared jars over the crust. Smooth the tops or leave them rustic. Refrigerate the jars for at least 2 hours to allow them to set firmly.
Step 5: Garnish and Serve
Just before serving, top each jar with a dollop of extra whipped cream. Sprinkle a little extra pumpkin pie spice or a few crushed pecans on top for a professional look. Serve chilled and enjoy the creamy fall flavors.
Expert Tips for Perfect No Bake Pumpkin Cheesecake Jars
For the smoothest texture, ensure your cream cheese is completely at room temperature before mixing. Cold cream cheese will result in tiny lumps that are difficult to whisk out later. Use pure pumpkin puree rather than pumpkin pie filling; the latter contains added sugars and spices that will throw off the balance of this recipe. If you want a cleaner look when filling the jars, transfer the cheesecake mixture into a large piping bag or a plastic zip-top bag with the corner snipped off. This allows you to fill the jars without smearing the sides.
Delicious Variations
You can easily customize these jars to suit your taste. Swap the graham crackers for gingersnap cookies or Biscoff biscuits to add a spicier, deeper crunch. For a chocolate twist, use crushed Oreo cookies for the base. If you enjoy a bit of decadence, drizzle salted caramel sauce between the crust and the filling. You can also make a “skinny” version by using low-fat cream cheese and a sugar substitute, though the texture may be slightly less creamy.
Frequently Asked Questions
How long do these cheesecake jars last in the fridge?
These jars will stay fresh and delicious for up to 3 to 4 days when stored in the refrigerator. Make sure to cover them with plastic wrap or their lids to prevent them from absorbing other odors in the fridge.
Can I freeze no-bake pumpkin cheesecake?
Yes, you can freeze these! They make a great frozen treat. Wrap them tightly and freeze for up to one month. Thaw them in the refrigerator for a few hours before serving to regain that creamy texture.
Is pumpkin puree the same as pumpkin pie filling?
No, they are different. Pumpkin puree is 100% cooked pumpkin with no additives. Pumpkin pie filling is pre-sweetened and spiced. For this recipe, you must use pure pumpkin puree to control the flavor and sweetness.
Can I make this recipe vegan?
You can certainly adapt this! Use a vegan cream cheese brand, replace the butter with melted coconut oil or vegan margarine, and use a coconut-based whipped topping or whipped coconut cream instead of heavy dairy cream.
Why is my filling too soft?
If the filling is too soft, it usually means the cream cheese wasn’t beaten enough or the whipped cream was folded in too vigorously, losing its air. Ensure you chill the jars for at least two hours to give the fat in the cream cheese time to firm up.
Conclusion
No Bake Pumpkin Cheesecake Jars are the perfect solution for a stress-free dessert that still feels fancy. With their layers of buttery crust and spiced pumpkin cream, they capture the essence of fall in every spoonful. They are quick to assemble, easy to customize, and guaranteed to be a hit at your next gathering. Give this recipe a try and enjoy a classic holiday flavor without ever turning on your oven!
No Bake Pumpkin Cheesecake Jars
- Total Time: 25 minutes
- Diet: Vegetarian
Ingredients
- 1 ½ cups graham cracker crumbs
- 4 tablespoons unsalted butter, melted
- 1 tablespoon brown sugar
- 8 ounces cream cheese, softened to room temperature
- 1 cup pumpkin puree (not pumpkin pie filling)
- ½ cup powdered sugar
- 1 teaspoon vanilla extract
- 1 ½ teaspoons pumpkin pie spice
- 1 ½ cups heavy whipping cream (or 2 cups whipped topping)
- Optional: Whipped cream and pecans for garnish
Instructions
- Step 1: Prepare the Graham Cracker Crust In a medium bowl, combine the graham cracker crumbs, melted butter, and brown sugar. Stir until the mixture looks like wet sand. Distribute the mixture evenly among six small jars or ramekins. Use a small spoon or the end of a cocktail muddler to press the crumbs firmly into the bottom of each jar. Set the jars aside while you prepare the filling.
- Step 2: Whip the Cream In a chilled mixing bowl, beat the heavy whipping cream until stiff peaks form. If you are using pre-made whipped topping, you can skip this step. Be careful not to over-beat the cream, or it will turn into butter. Once it is light and airy, set it aside in the refrigerator to keep it cold.
- Step 3: Mix the Cheesecake Base In a large mixing bowl, beat the softened cream cheese and powdered sugar together until the mixture is completely smooth and lump-free. Add the pumpkin puree, vanilla extract, and pumpkin pie spice. Continue beating on medium speed until the color is uniform and the ingredients are well incorporated. Scrape down the sides of the bowl to ensure everything is mixed.
- Step 4: Fold and Assemble Gently fold the whipped cream into the pumpkin mixture using a spatula. Use a slow “under-and-over” motion to keep the filling airy. Once combined, spoon or pipe the filling into the prepared jars over the crust. Smooth the tops or leave them rustic. Refrigerate the jars for at least 2 hours to allow them to set firmly.
- Step 5: Garnish and Serve Just before serving, top each jar with a dollop of extra whipped cream. Sprinkle a little extra pumpkin pie spice or a few crushed pecans on top for a professional look. Serve chilled and enjoy the creamy fall flavors.
- Cook Time: 25 minutes