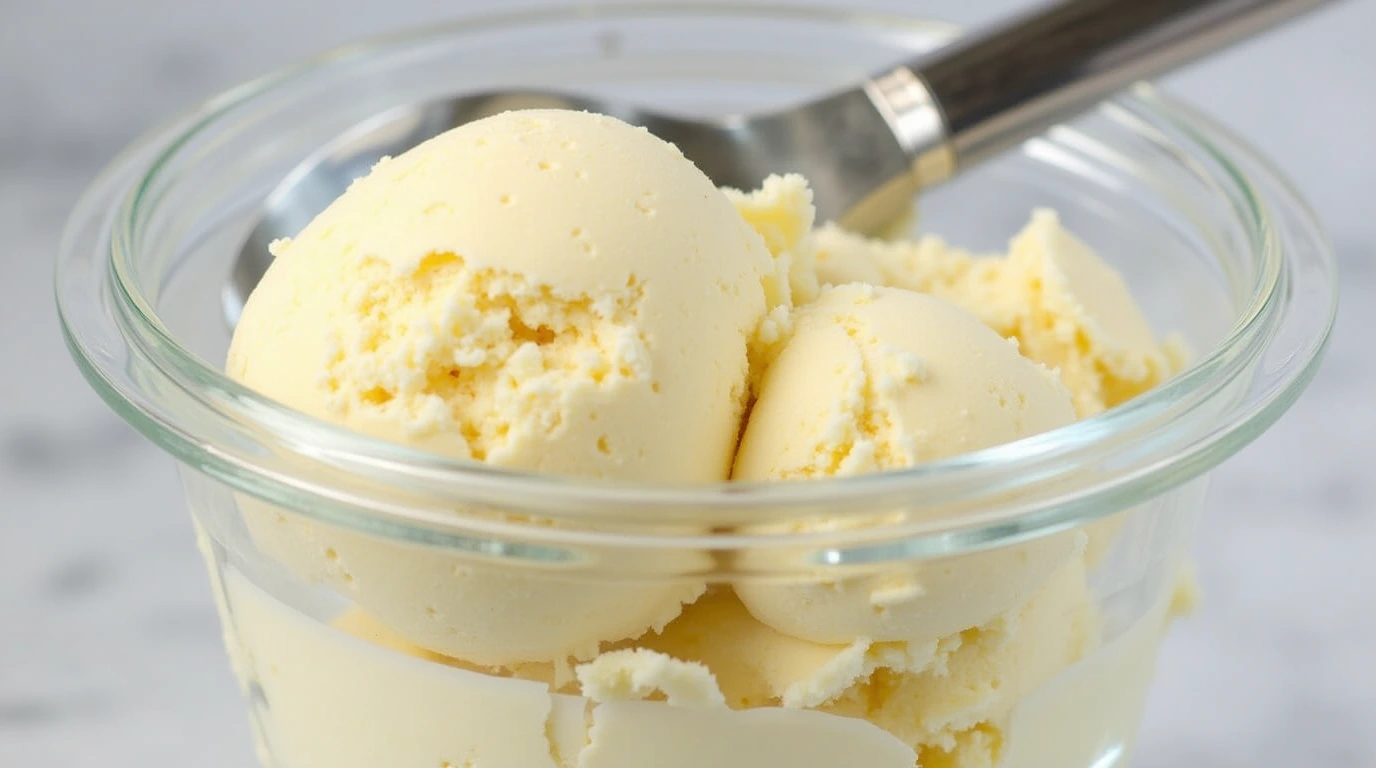
Pistachio ice cream is a classic treat that needs no artificial colors to shine. With the vibrant flavors of real pistachios and a hint of almond extract, this Ninja Creami Pistachio Ice Cream recipe is sure to satisfy your cravings. It’s easy to make and offers a rich, creamy texture that is perfect for warm days or special occasions. Let’s dive into the details of this delightful dessert!
Recipe Information
- Prep Time: 10 minutes
- Cook Time: 0 minutes (freezing time varies)
- Total Time: 24 hours 10 minutes
- Servings: 4 servings
- Difficulty Level: Easy
Nutrition Information
- Calories per serving: 290
- Protein: 4 grams
- Carbohydrates: 27 grams
- Fat: 18 grams
- Fiber: 1 gram
- Sugar: 12 grams
- Sodium: 50 mg
Why Make This Ninja Creami Pistachio Ice Cream No Artificial Dyes
This homemade pistachio ice cream is not only delicious but also free from artificial dyes and preservatives. Using fresh, raw pistachios provides an earthy flavor and a beautiful green hue, all while ensuring that you know exactly what’s in your treat. The combination of cream cheese and half-and-half gives this ice cream a creamy texture, making it a perfect dessert for family gatherings, summer barbecues, or a sweet finish to any meal.
How to Make Ninja Creami Pistachio Ice Cream No Artificial Dyes
Creating your own pistachio ice cream at home is a fun and rewarding experience. With just a few simple ingredients and the help of a Ninja Creami, you can whip up a batch of this delightful dessert in no time.
Ingredients:
- 1 tablespoon softened Cream Cheese
- 1/3 cup Sugar or Monk Fruit
- 1 teaspoon Almond Extract
- 1/3 cup finely chopped raw Pistachios
- 3/4 cup of Half and Half
- 1/2 to 3/4 cups of Milk (add to the fill line)
- A few raw Pistachios to serve on top
Directions:
Step 1: Preparation
Soften 1 tablespoon of cream cheese in the microwave for 15 seconds. This will make it easier to mix with the sugar and create a smooth base for your ice cream.
Step 2: Mixing
In a medium bowl or a large measuring cup, combine the softened cream cheese and sugar (or Monk Fruit) and mix well until creamy. Add in the almond extract and mix again to incorporate the flavors.
Step 3: Adding Base Ingredients
Next, pour in the half-and-half. This rich ingredient will give your ice cream a luxurious texture.
Step 4: Preparing Pistachios
Use a food processor or coffee grinder to process the pistachios into a fine rough chop, but not so finely that it becomes a powder. You want to maintain some texture in your ice cream.
Step 5: Assembling
Add the ice cream mixture and chopped pistachios into a Ninja Creami pint container, filling to the max fill line with milk. This provides extra creaminess.
Step 6: Freezing
Place the storage lid tightly on the pint container and freeze for at least 24 hours. This allows it to firm up perfectly for the creamiest texture.
Step 7: Processing
When you’re ready to enjoy your homemade pistachio ice cream, remove the pint container from the freezer. Allow it to sit at room temperature for 10 to 15 minutes. This step is critical as it ensures a smooth, creamy texture when processed in the Ninja Creami.
Step 8: Blending
Place the pint container into the outer bowl of the Ninja Creami. Secure the blade and lid. Set it on the machine and select the “Ice Cream” function. If the ice cream appears a little crumbly, run the "Re-spin" function to achieve perfect creaminess.
How to Serve Ninja Creami Pistachio Ice Cream No Artificial Dyes
Serve your delicious pistachio ice cream in scoops, garnished with a few raw pistachios on top for added crunch and visual appeal. Pair it with a sprinkle of sea salt for a sweet and salty contrast or serve alongside a warm slice of chocolate cake for a delightful dessert duo.
How to Store Ninja Creami Pistachio Ice Cream No Artificial Dyes
Store any leftover pistachio ice cream in the Ninja Creami pint container with a tight lid in the freezer. It should remain good for about 2 weeks. After that, the texture may change as ice crystals form.
Expert Tips for Perfect Ninja Creami Pistachio Ice Cream No Artificial Dyes
- Make sure your cream cheese is adequately softened to avoid lumps.
- Adjust the sweetness by experimenting with different sweeteners, such as honey or agave syrup.
- For a richer flavor, you can add a pinch of salt to enhance the pistachio taste.
- Pre-chill your Ninja Creami machine for optimal results.
Delicious Variations
- Chocolate Pistachio Delight: Mix in some cocoa powder for a chocolate twist on the classic flavor.
- Minted Pistachio Ice Cream: Incorporate a few drops of peppermint extract for a refreshing herbal flavor.
- Nutty Blend: Add other nuts like chopped walnuts or pecans to the pistachios for extra richness and texture.
Frequently Asked Questions
Can I use salted pistachios?
Absolutely! Salted pistachios can add an interesting salty flavor contrast. Just reduce the added salt in your recipe if you choose to use them.
How do I know when my ice cream is ready?
The ice cream should feel firm to the touch and hold its shape when scooped. If it seems too soft, give it a little more time in the freezer.
Can I make this ice cream dairy-free?
Yes! Substitute the half-and-half and milk with coconut milk or plant-based milk alternatives for a delightful dairy-free version.
How can I make this ice cream more nutty?
Consider adding a tablespoon of pistachio paste to your mixture for an even more intense pistachio flavor.
Can I use other extracts besides almond?
Definitely! You can experiment with options like vanilla or hazelnut extract to create your unique flavor profile.
Conclusion
Making Ninja Creami Pistachio Ice Cream No Artificial Dyes is not just easy; it’s a fun way to bring a beloved dessert to life right in your kitchen! With its creamy texture and genuine nutty flavors, this treat is perfect for satisfying your sweet cravings or impressing your guests. Don’t be afraid to customize it to your taste and enjoy a scoop of something truly special. Happy ice cream making!