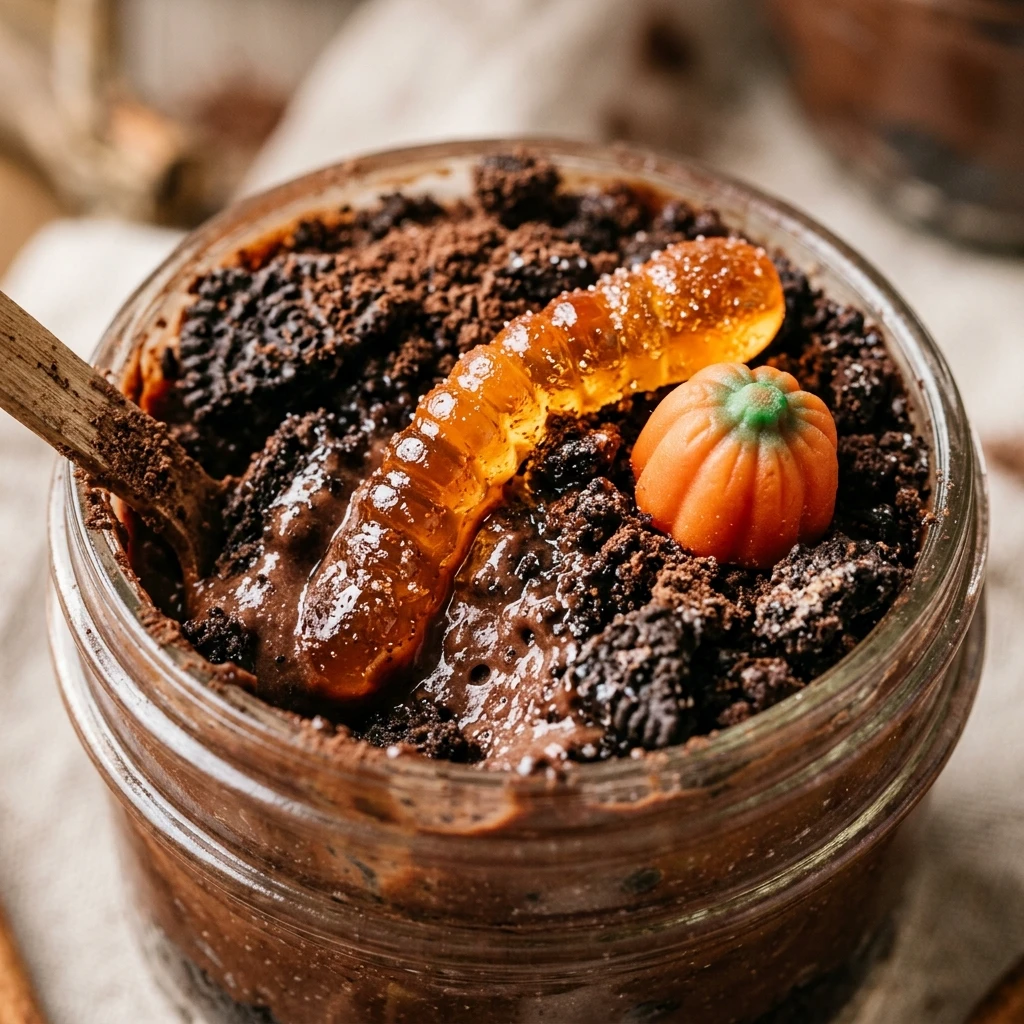
Get ready to bring some spooky, chocolatey fun to your next October gathering with these Halloween Dirt Cups. This classic dessert is a nostalgic favorite that combines creamy pudding, crunchy “dirt” cookies, and creepy-crawly treats. Whether you are hosting a haunted house party or looking for a quick after-school snack for the kids, these cups are guaranteed to disappear faster than a ghost in the night. The best part? There is absolutely no baking required, making this the ultimate stress-free holiday treat.
Recipe Information
- Prep Time: 20 minutes
- Cook Time: 0 minutes
- Total Time: 20 minutes
- Servings: 6 servings
- Difficulty: Easy
Nutrition values
- Calories: 345 kcal
- Protein: 5g
- Carbs: 52g
Why Make This Halloween Dirt Cups
Halloween Dirt Cups are the perfect DIY dessert because they are highly customizable and incredibly simple to assemble. You don’t need to be a professional pastry chef to make these look amazing; in fact, the messier they look, the more realistic the “dirt” effect becomes. Kids love helping with the assembly, from crushing the cookies to placing the gummy worms. They are also easy to serve in individual portions, which makes them ideal for school parties or buffet tables where guests can just grab and go.
Ingredients
- 2 cups cold whole milk
- 1 package (3.9 oz) instant chocolate pudding mix
- 1 container (8 oz) whipped topping, thawed
- 1 package (14.3 oz) Oreo cookies (or similar chocolate sandwich cookies)
- 1 pack gummy worms
- Rectangular butter cookies (for tombstones)
- Black decorating gel or melted chocolate
- Candy pumpkins or bone-shaped sprinkles
Directions
Step 1: Crushing the Cookies
Place the chocolate sandwich cookies into a large gallon-sized freezer bag. Seal the bag tightly, removing as much air as possible. Use a rolling pin or a heavy pan to crush the cookies until they resemble fine crumbs with a few larger chunks mixed in. These will serve as your edible soil. Set the crushed cookies aside in a bowl.
Step 2: Preparing the Pudding Mixture
In a large mixing bowl, whisk together the cold milk and the instant chocolate pudding mix. Continue whisking for about two minutes until the mixture begins to thicken. Once the pudding is set, gently fold in the thawed whipped topping using a spatula. Mix until the color is uniform and the texture is light and fluffy.
Step 3: Layering the Cups
Take six clear plastic cups or small glass jars. Start by placing two tablespoons of the crushed cookie “dirt” at the bottom of each cup. Spoon a generous layer of the chocolate pudding mixture over the cookies. Repeat the layers—more cookies followed by more pudding—until the cups are nearly full. Finish each cup with a final thick layer of cookie crumbs on top.
Step 4: Decorating for Halloween
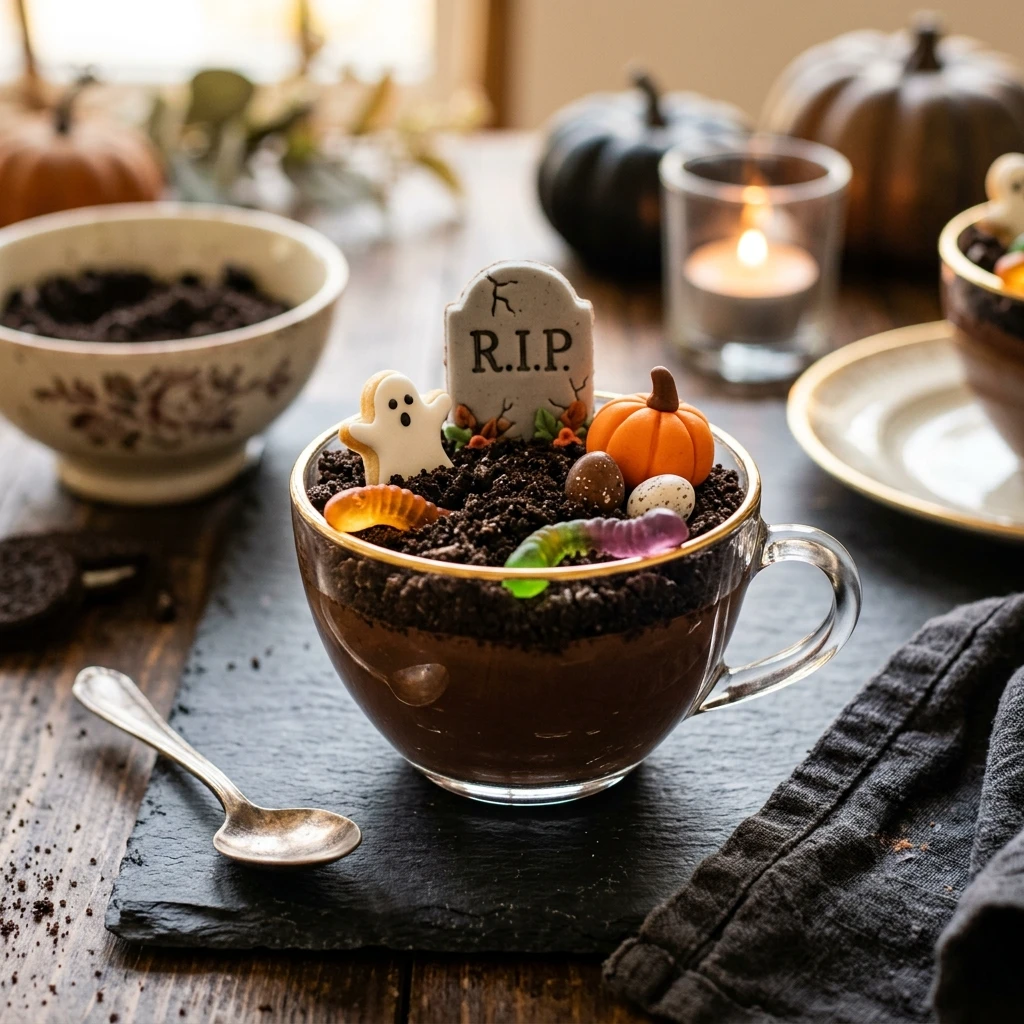
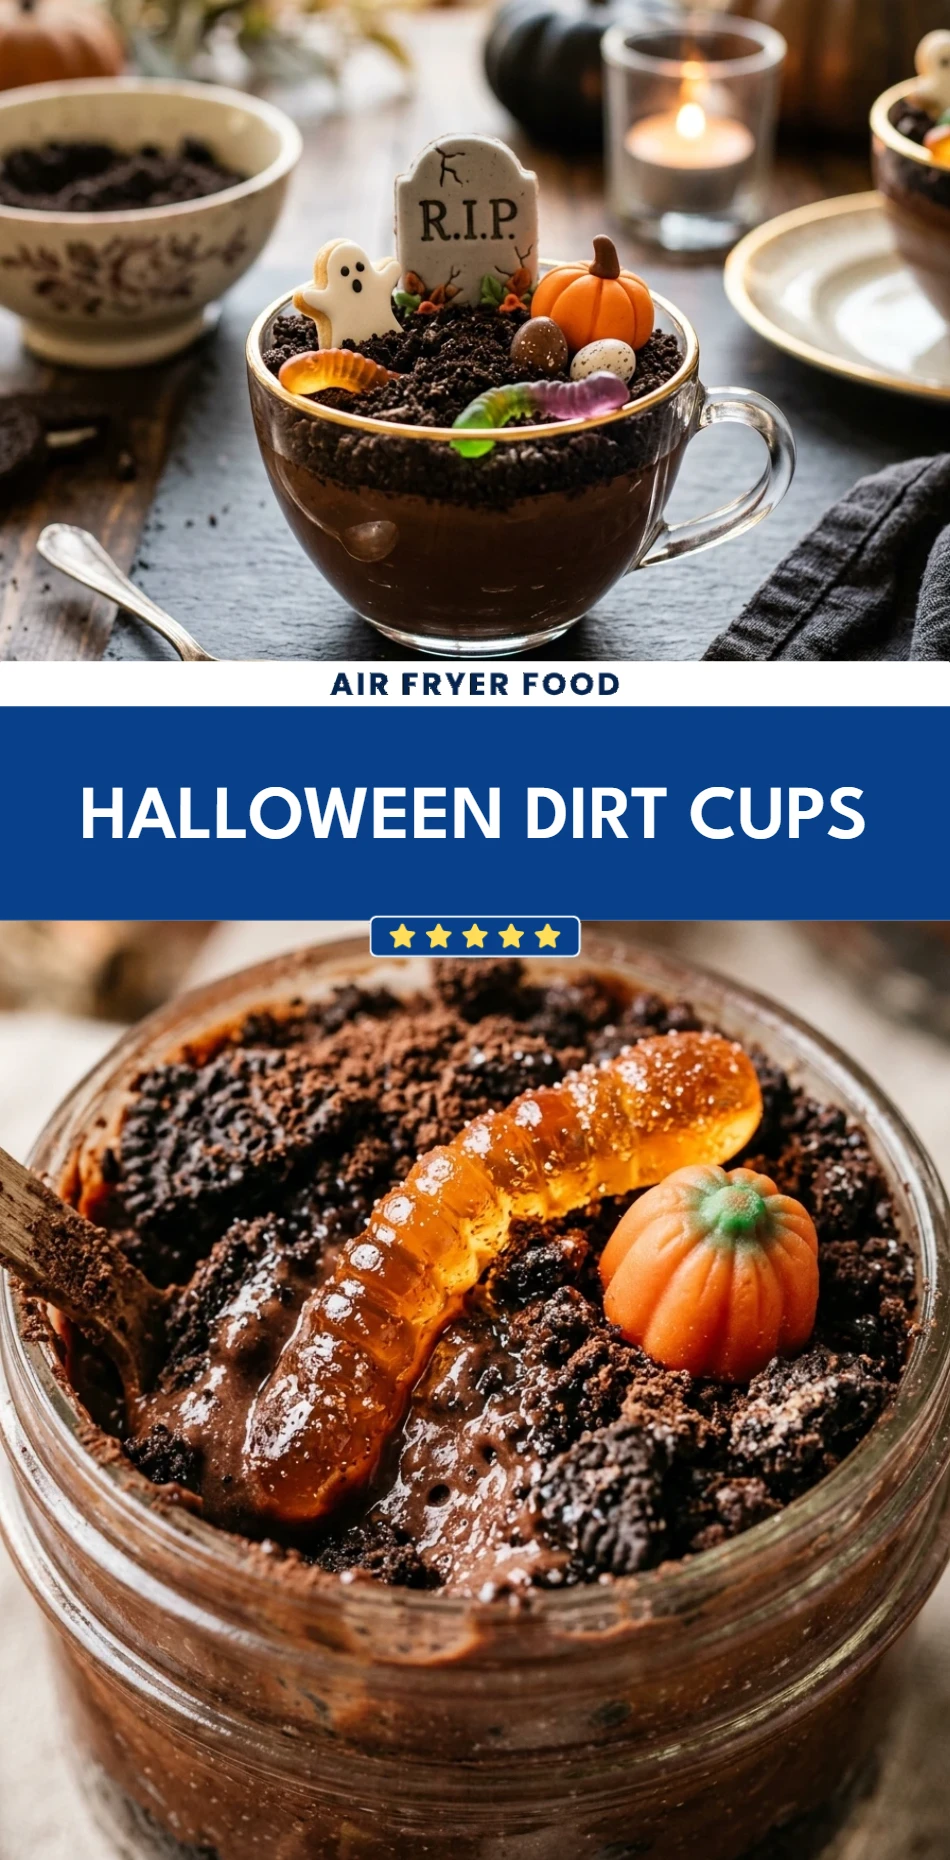
Now comes the fun part. Use the black decorating gel to write “RIP” or draw small crosses on the rectangular butter cookies to create tombstones. Press one tombstone into the back of each cup so it stands upright. Poke a few gummy worms into the dirt so they look like they are crawling out. Add candy pumpkins or bone sprinkles to complete the graveyard scene. Chill in the refrigerator for at least 30 minutes before serving.
Expert Tips for Perfect Halloween Dirt Cups
For the best results, always use cold milk for the pudding to ensure it sets quickly. If you want a richer flavor, try using dark chocolate pudding instead of regular milk chocolate. To keep the “tombstone” cookies from getting soggy, wait to add them until just before you serve the cups. You can also use a food processor to crush the cookies if you want a very fine, uniform sand texture, but hand-crushing provides a more realistic, rocky dirt appearance.
Delicious Variations
You can easily swap ingredients to fit different themes. Use vanilla pudding with green food coloring to create a “swamp” look, or use crushed graham crackers instead of Oreos for a “sandy beach” vibe. If you prefer a more natural option, use Greek yogurt mixed with cocoa powder instead of pudding and whipped topping. For an adult twist, you can even add a splash of Irish cream or coffee liqueur to the pudding mixture before chilling.
Frequently Asked Questions
Can I make these dirt cups a day in advance?
Yes, you can assemble the pudding and cookie layers up to 24 hours in advance. However, wait to add the gummy worms and the tombstone cookies until you are ready to serve so they don’t lose their texture or get too soft in the fridge.
What are the best cups to use?
Clear 9-ounce plastic cups are the standard choice because they allow you to see the layers of “dirt” and pudding. Small mason jars also work beautifully for a more rustic, farmhouse look.
Can I use homemade whipped cream instead of whipped topping?
Absolutely! You can substitute the thawed whipped topping with an equal amount of heavy cream whipped with a little powdered sugar. Keep in mind that real whipped cream is less stable than store-bought topping, so the cups may need to be eaten sooner.
Is there a gluten-free version?
Yes, simply use your favorite brand of gluten-free chocolate sandwich cookies and ensure your pudding mix is certified gluten-free. Most instant puddings are naturally gluten-free, but always check the label.
How should I store leftover dirt cups?
Store any leftovers in the refrigerator, covered with plastic wrap, for up to three days. Note that the cookie crumbs will soften significantly the longer they sit in contact with the pudding.
Conclusion
Halloween Dirt Cups are a whimsical and delicious way to celebrate the spooky season. They offer the perfect balance of creamy and crunchy textures that guests of all ages will enjoy. Since they require no heat and very little cleanup, they are the ideal recipe for busy families. Whip up a batch this October and watch as everyone digs into their very own edible graveyard!
Halloween Dirt Cups
- Total Time: 20 minutes
- Diet: Gluten-Free
Ingredients
- 2 cups cold whole milk
- 1 package (3.9 oz) instant chocolate pudding mix
- 1 container (8 oz) whipped topping, thawed
- 1 package (14.3 oz) Oreo cookies (or similar chocolate sandwich cookies)
- 1 pack gummy worms
- Rectangular butter cookies (for tombstones)
- Black decorating gel or melted chocolate
- Candy pumpkins or bone-shaped sprinkles
Instructions
- Place the chocolate sandwich cookies into a large gallon-sized freezer bag. Seal the bag tightly, removing as much air as possible. Use a rolling pin or a heavy pan to crush the cookies until they resemble fine crumbs with a few larger chunks mixed in. These will serve as your edible soil. Set the crushed cookies aside in a bowl.
- In a large mixing bowl, whisk together the cold milk and the instant chocolate pudding mix. Continue whisking for about two minutes until the mixture begins to thicken. Once the pudding is set, gently fold in the thawed whipped topping using a spatula. Mix until the color is uniform and the texture is light and fluffy.
- Take six clear plastic cups or small glass jars. Start by placing two tablespoons of the crushed cookie “dirt” at the bottom of each cup. Spoon a generous layer of the chocolate pudding mixture over the cookies. Repeat the layers—more cookies followed by more pudding—until the cups are nearly full. Finish each cup with a final thick layer of cookie crumbs on top.
- Use the black decorating gel to write “RIP” or draw small crosses on the rectangular butter cookies to create tombstones. Press one tombstone into the back of each cup so it stands upright. Poke a few gummy worms into the dirt so they look like they are crawling out. Add candy pumpkins or bone sprinkles to complete the graveyard scene. Chill in the refrigerator for at least 30 minutes before serving.
- Cook Time: 20 minutes