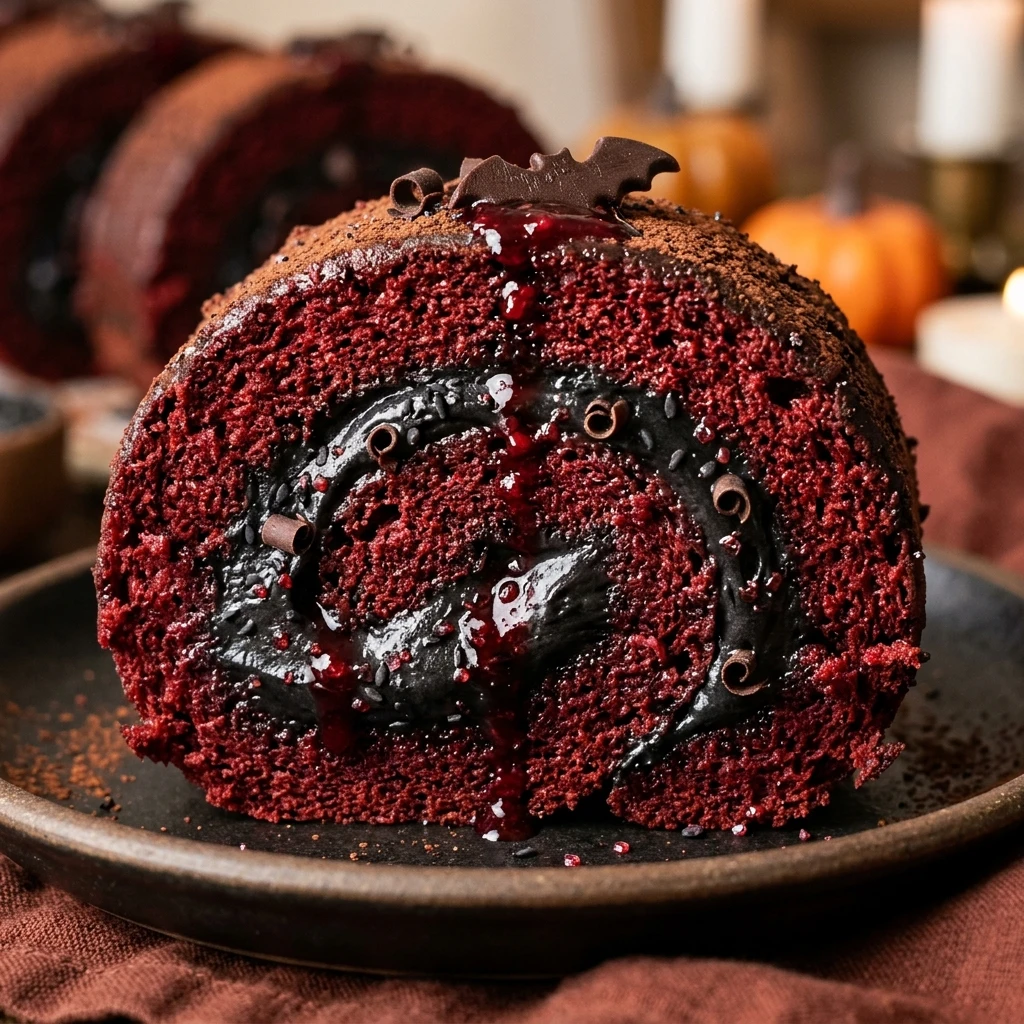
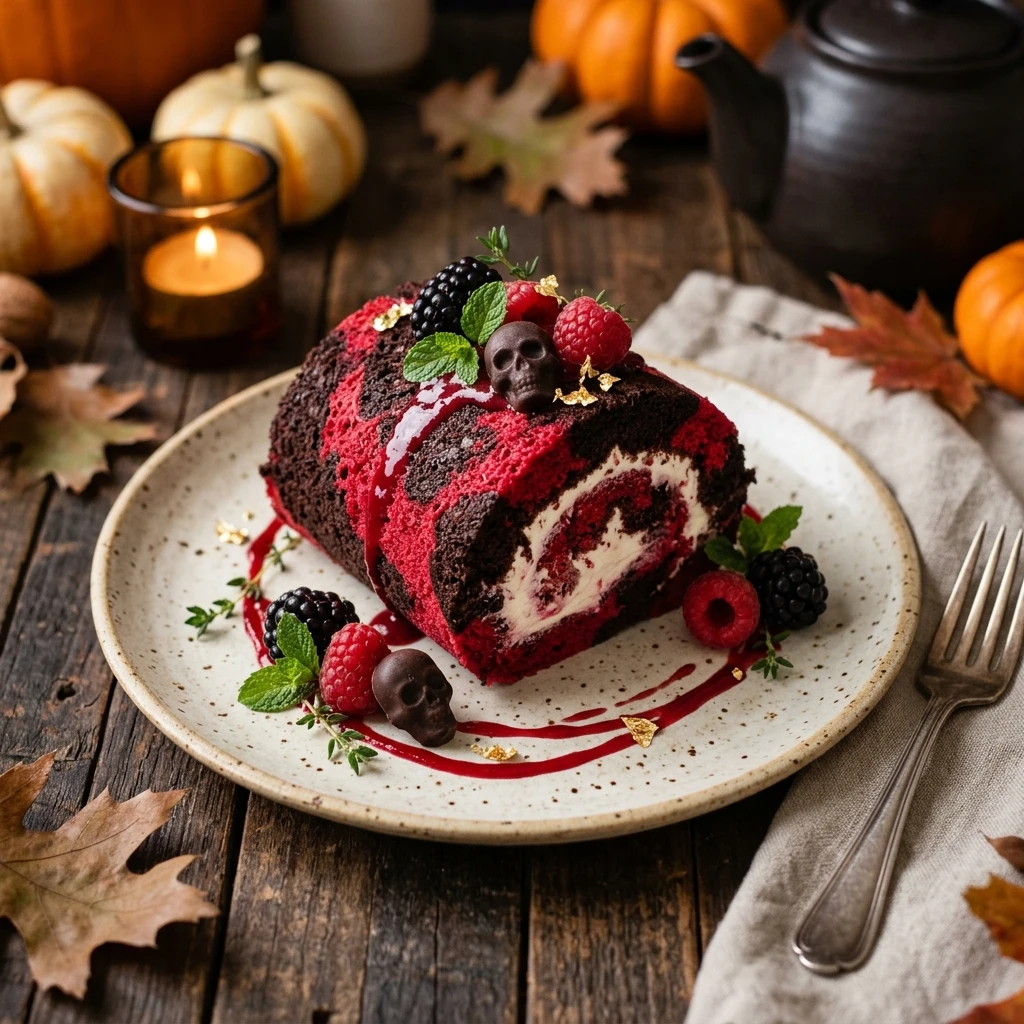
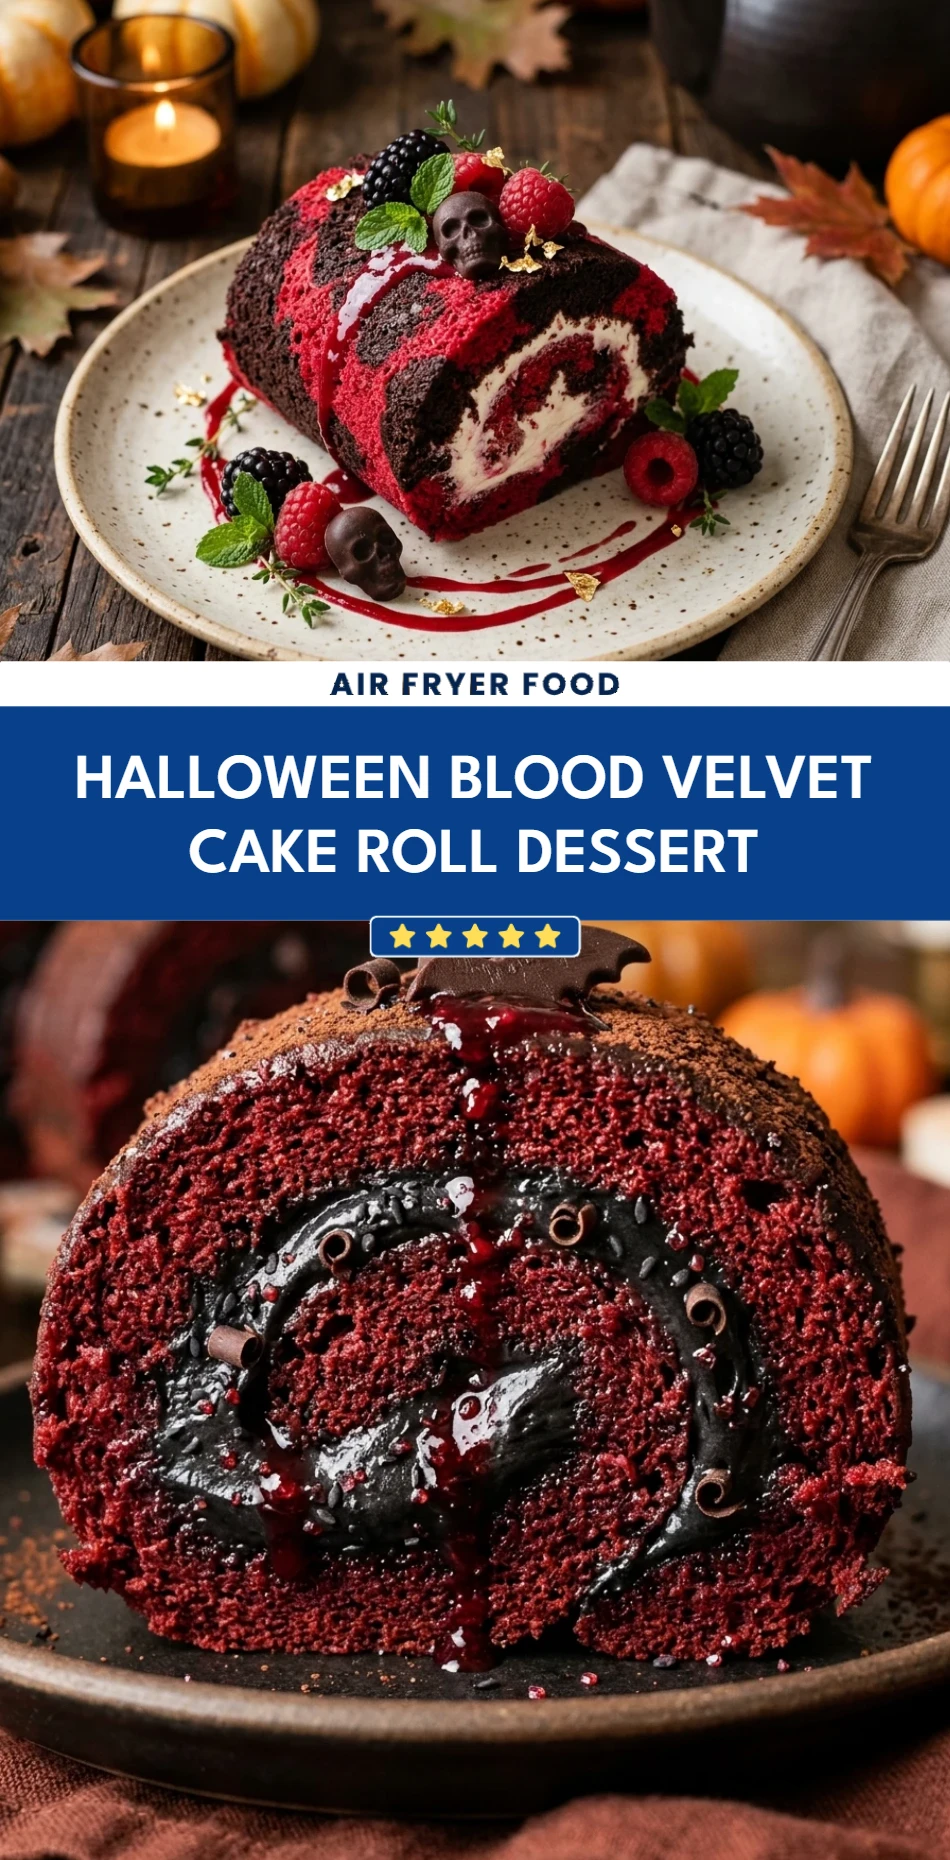
Get ready to steal the show at your next spooky soirée with a dessert that is as macabre as it is delicious. This Halloween Blood Velvet Cake Roll takes the classic elegance of a red velvet sponge and gives it a grizzly, festive twist. Imagine a light, cocoa-infused cake rolled around a tangy cream cheese filling, then “slashed” with a vibrant, dripping raspberry glaze that looks just like fresh blood. It is the ultimate centerpiece for any haunted gathering, offering a sophisticated flavor profile with a delightfully gory presentation that will have your guests reaching for seconds—if they dare.
Recipe Information
- Prep Time: 30 minutes
- Cook Time: 12 minutes
- Total Time: 42 minutes
- Servings: 10 servings
- Difficulty: Medium
Nutrition values
- Calories: 345 kcal
- Protein: 5g
- Carbs: 48g
Why Make This Halloween Blood Velvet Cake Roll Dessert
This dessert strikes the perfect balance between high-concept Halloween fun and genuine gourmet taste. Unlike some holiday treats that prioritize looks over flavor, this cake roll delivers the signature tang and velvety crumb of a traditional red velvet cake. The rolling technique creates a beautiful spiral that looks professional, while the “blood” drizzle allows you to get creative without needing advanced decorating skills. It is also surprisingly easy to transport, making it the ideal “bring-along” dish for office parties or neighborhood potlucks. Plus, the contrast between the stark white frosting and the deep crimson drizzle creates a stunning visual that pops in photos.
Ingredients
For the Cake:
- 3/4 cup all-purpose flour
- 1/4 cup unsweetened cocoa powder
- 1 teaspoon baking powder
- 1/2 teaspoon salt
- 4 large eggs, room temperature
- 3/4 cup granulated sugar
- 1 tablespoon vegetable oil
- 2 tablespoons buttermilk
- 1 teaspoon white vinegar
- 1 teaspoon vanilla extract
- 1 tablespoon red food coloring (gel preferred)
- Powdered sugar (for rolling)
For the Filling & “Blood” Drizzle:
- 8 oz cream cheese, softened
- 1/4 cup unsalted butter, softened
- 2 cups powdered sugar
- 1 teaspoon vanilla extract
- 1/2 cup raspberry jam (seedless)
- 1-2 drops red food coloring (to darken the jam)
Directions
Step 1: Preparation and Oven Setup
Preheat your oven to 350°F (175°C). Line a 10×15 inch jelly roll pan with parchment paper, leaving an inch of overhang on the sides. Grease the parchment paper lightly with cooking spray. Sift the flour, cocoa powder, baking powder, and salt into a medium bowl and set aside. Prepare a clean kitchen towel by dusting it generously with powdered sugar; this prevents the cake from sticking during the initial rolling phase.
Step 2: Mixing the Batter
In a large bowl, beat the eggs and granulated sugar at high speed for about 5 minutes until the mixture is thick, pale, and doubled in volume. Whisk in the oil, buttermilk, vinegar, vanilla, and red food coloring until the color is uniform. Gently fold in the dry ingredients using a spatula until just combined, being careful not to deflate the eggs. Pour the batter into the prepared pan and spread it evenly into the corners.
Step 3: Baking the Sponge
Bake for 12 to 15 minutes, or until the top of the cake springs back when lightly touched. Do not overbake, as a dry cake will crack when rolled. Immediately after removing the cake from the oven, turn it out onto the sugar-dusted kitchen towel. Carefully peel off the parchment paper. Starting at one of the short ends, roll the warm cake and the towel together tightly. Let the rolled cake cool completely on a wire rack for about 1 hour.
Step 4: Creating the Cream Cheese Filling
While the cake cools, prepare the filling. In a medium bowl, beat the softened cream cheese and butter together until smooth and creamy. Gradually add the powdered sugar and vanilla extract, beating until the frosting is stiff and spreadable. If the mixture is too soft, refrigerate it for 15 minutes to firm up.
Step 5: Filling and Finishing the Roll
Carefully unroll the cooled cake. Spread the cream cheese filling evenly over the surface, leaving a half-inch border at the edges. Re-roll the cake tightly (this time without the towel). Wrap the cake roll in plastic wrap and refrigerate for at least 30 minutes to set the shape. Before serving, whisk the raspberry jam with a drop of red food coloring to create a deep “blood” red. Drizzle the jam over the top of the cake in a messy, “slashed” pattern.
Expert Tips for Perfect Halloween Blood Velvet Cake Roll Dessert
The secret to a crack-free roll is temperature; you must roll the cake while it is still steaming hot from the oven so it “remembers” the shape as it cools. Use a high-quality gel food coloring rather than liquid to achieve that deep, gory red without thinning out your batter. If your cake does develop small cracks, don’t panic! The cream cheese frosting and the “blood” drizzle are perfect for camouflaging any imperfections. For the cleanest slices, use a serrated knife and wipe it clean with a warm cloth between every single cut.
Delicious Variations
If you want to amp up the “spooky” factor, press edible glass shards made from melted sugar into the top of the cake. For a different flavor profile, swap the cream cheese filling for a bright green “slime” filling by adding neon green food coloring and a hint of peppermint extract to white chocolate ganache. You can also make a “Black Widow” version by using dark chocolate cocoa powder for a nearly black cake and filling it with bright red frosting. For a boozy adult version, brush the sponge with a little bit of bourbon or coffee liqueur before spreading the filling.
Frequently Asked Questions
How do I prevent the cake from cracking?
The most common cause of cracking is overbaking or waiting too long to roll the cake. Ensure you roll the cake in a towel while it is still very hot. The moisture trapped in the towel keeps the sponge pliable.
Can I make this cake roll in advance?
Yes! You can bake and fill the cake a day in advance. Keep it tightly wrapped in plastic wrap in the refrigerator. Wait to add the raspberry “blood” drizzle until just before serving so it doesn’t soak into the frosting.
What if I don’t have a jelly roll pan?
You can use a standard rimmed baking sheet, but keep a close eye on the bake time as the dimensions might vary slightly. Ensure the batter is spread to a consistent thickness of about 1/4 inch.
How should I store leftovers?
Store any remaining cake in an airtight container in the refrigerator for up to 3 days. Because of the cream cheese filling, it should not be left at room temperature for more than two hours.
Can I freeze the Blood Velvet Cake Roll?
Absolutely. Wrap the filled (but undrizzled) cake roll in plastic wrap and then aluminum foil. It will stay fresh in the freezer for up to one month. Thaw in the refrigerator overnight before decorating and serving.
Conclusion
This Halloween Blood Velvet Cake Roll is the perfect marriage of spooky aesthetics and delicious flavor. It turns a standard dessert into a conversational masterpiece that fits perfectly on a holiday table. Whether you are hosting a formal dinner or a wild costume party, this cake provides the “wow” factor every baker loves. Follow the steps carefully, embrace the messy drizzle, and enjoy the gasps of delight (and mock horror) from your guests as you slice into this crimson treat.
Halloween Blood Velvet Cake Roll Dessert
- Total Time: 42 minutes
- Diet: Vegetarian
Ingredients
- 3/4 cup all-purpose flour
- 1/4 cup unsweetened cocoa powder
- 1 teaspoon baking powder
- 1/2 teaspoon salt
- 4 large eggs, room temperature
- 3/4 cup granulated sugar
- 1 tablespoon vegetable oil
- 2 tablespoons buttermilk
- 1 teaspoon white vinegar
- 1 teaspoon vanilla extract
- 1 tablespoon red food coloring (gel preferred)
- Powdered sugar (for rolling)
- 8 oz cream cheese, softened
- 1/4 cup unsalted butter, softened
- 2 cups powdered sugar
- 1 teaspoon vanilla extract
- 1/2 cup raspberry jam (seedless)
- 1–2 drops red food coloring (to darken the jam)
Instructions
- Preheat your oven to 350°F (175°C). Line a 10×15 inch jelly roll pan with parchment paper, leaving an inch of overhang on the sides. Grease the parchment paper lightly with cooking spray. Sift the flour, cocoa powder, baking powder, and salt into a medium bowl and set aside. Prepare a clean kitchen towel by dusting it generously with powdered sugar; this prevents the cake from sticking during the initial rolling phase.
- In a large bowl, beat the eggs and granulated sugar at high speed for about 5 minutes until the mixture is thick, pale, and doubled in volume. Whisk in the oil, buttermilk, vinegar, vanilla, and red food coloring until the color is uniform. Gently fold in the dry ingredients using a spatula until just combined, being careful not to deflate the eggs. Pour the batter into the prepared pan and spread it evenly into the corners.
- Bake for 12 to 15 minutes, or until the top of the cake springs back when lightly touched. Do not overbake, as a dry cake will crack when rolled. Immediately after removing the cake from the oven, turn it out onto the sugar-dusted kitchen towel. Carefully peel off the parchment paper. Starting at one of the short ends, roll the warm cake and the towel together tightly. Let the rolled cake cool completely on a wire rack for about 1 hour.
- While the cake cools, prepare the filling. In a medium bowl, beat the softened cream cheese and butter together until smooth and creamy. Gradually add the powdered sugar and vanilla extract, beating until the frosting is stiff and spreadable. If the mixture is too soft, refrigerate it for 15 minutes to firm up.
- Carefully unroll the cooled cake. Spread the cream cheese filling evenly over the surface, leaving a half-inch border at the edges. Re-roll the cake tightly (this time without the towel). Wrap the cake roll in plastic wrap and refrigerate for at least 30 minutes to set the shape. Before serving, whisk the raspberry jam with a drop of red food coloring to create a deep “blood” red. Drizzle the jam over the top of the cake in a messy, “slashed” pattern.
- Cook Time: 42 minutes