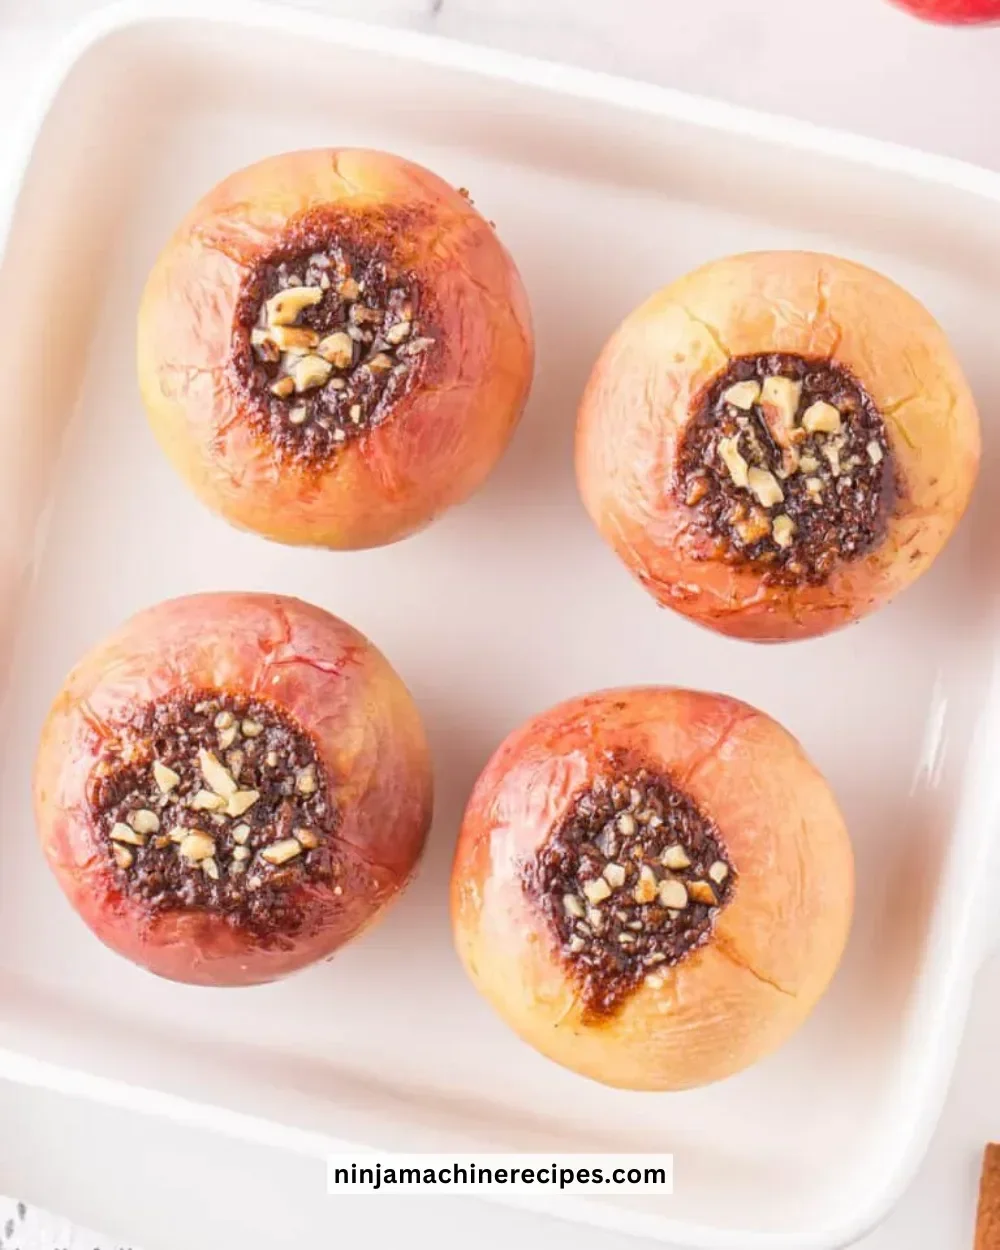
Classic Baked Apples are a delightful dessert that captures the essence of comfort food. Their warm, sweet aroma fills your kitchen as they bake, inviting everyone to gather around the table. With just a few simple ingredients, this classic recipe creates a perfect ending to any meal or a cozy afternoon snack. Whether you enjoy them plain or topped with vanilla ice cream, baked apples are sure to please.
Recipe Information
- Prep Time: 10 minutes
- Cook Time: 25-30 minutes
- Total Time: 35-40 minutes
- Servings: 4
- Difficulty Level: Easy
Nutrition Information
- Calories per serving: 190
- Protein: 2g
- Carbohydrates: 32g
- Fat: 7g
- Fiber: 3g
- Sugar: 22g
- Sodium: 40mg
Why Make This Classic Baked Apples
Baked apples are not just a delicious treat; they are incredibly versatile and healthy. With their natural sweetness and soluble fiber, they make a great alternative to more processed desserts. The combination of warm apples, brown sugar, and spices creates a comforting dish that warms both the heart and the home. Plus, it’s a fantastic way to use seasonal apples and create a sweet dish that’s both simple and elegant.
How to Make Classic Baked Apples
Follow these easy steps to create your own Classic Baked Apples, and enjoy a delicious dessert that feels like a warm hug from the inside.
Ingredients:
- 4 large apples
- 1/4 cup brown sugar
- 1 teaspoon cinnamon
- 1/4 cup raisins
- 1/4 cup chopped nuts (walnuts or pecans)
- 2 tablespoons butter
- 1/2 cup apple juice or water
Directions:
Step 1: Preparation
Preheat the oven to 350°F (175°C). While the oven is heating, core the apples, ensuring you leave the bottom intact so the filling doesn’t fall out. Place the cored apples in a baking dish, standing upright.
Step 2: Mixing
In a bowl, combine the brown sugar, cinnamon, raisins, and chopped nuts. Stir well to combine all the ingredients into a sweet, chunky filling that will melt into the apples as they bake.
Step 3: Stuffing
Gently stuff the mixture into the center of each cored apple. Don’t be shy; pack it in for that extra deliciousness! Top each apple with a small piece of butter, which will melt into the filling, creating a rich flavor.
Step 4: Baking
Pour the apple juice or water into the bottom of the baking dish. This step is essential as it helps keep the apples moist while baking. Bake in the preheated oven for about 25-30 minutes, or until the apples are tender and just starting to wrinkle. The aroma will be irresistible!
How to Serve Classic Baked Apples
Serve your baked apples warm, right out of the oven. They are delightful on their own but can be enhanced with a scoop of vanilla ice cream, a dollop of whipped cream, or a sprinkle of extra cinnamon. Pair them with a cup of hot cider or a warm beverage for a truly cozy dessert experience.
How to Store Classic Baked Apples
If you have any leftovers (which is rare!), let the baked apples cool completely. Store them in an airtight container in the refrigerator for up to 3 days. When you’re ready to enjoy them again, simply reheat in the microwave or oven until warmed through.
Expert Tips for Perfect Classic Baked Apples
- Choose the Right Apples: Varieties like Granny Smith or Honeycrisp work best, as they hold their shape well during baking and have a nice balance of sweetness and tartness.
- Experiment with Spices: Consider adding nutmeg or cloves for an exciting twist on flavor.
- Adjust Sweetness: You can reduce the amount of brown sugar based on your preference or use a sugar substitute if desired.
- Add a Crunch: For extra texture, try mixing in some rolled oats or additional nuts into your stuffing.
- Keep an Eye on Them: Baking time varies based on the size of your apples; check for doneness by poking them with a fork to see if they’re tender.
Delicious Variations
- For an adult twist, drizzle some bourbon or rum over the apples before baking.
- Make them even more decadent by adding a layer of chocolate chips to the stuffing.
- Try using different dried fruits like cranberries or apricots for added flavor and texture.
Frequently Asked Questions
-
Can I make baked apples ahead of time?
Yes, you can prepare the apples and stuffing ahead and store them separately. Assemble and bake when ready to serve. -
What type of apples are best for baking?
Firm apples like Granny Smith, Fuji, or Honeycrisp hold up well and provide a great balance of tartness and sweetness. -
Can I use different sweeteners instead of brown sugar?
Absolutely! Maple syrup, honey, or agave nectar are great alternatives if you prefer a different flavor or sweetness level. -
What should I do if I can’t find raisins?
Substitute with any dried fruit you have on hand, such as cranberries or chopped dates—they’ll add a delicious chewiness. -
How long do baked apples stay fresh?
Baked apples can be stored in the refrigerator for up to 3 days. Reheat them when you’re ready to enjoy!
Conclusion
Classic Baked Apples are a timeless dish that brings warmth and joy to any occasion. This easy-to-follow recipe allows you to create a delicious dessert that showcases the natural sweetness of apples, enhanced by the richness of brown sugar and warm spices. So gather your ingredients, fire up your oven, and treat yourself and your loved ones to this delightful comfort food. Happy baking!
Print
Classic Baked Apples
- Total Time: 40 minutes
- Yield: 4 servings 1x
- Diet: Vegetarian
Description
A delightful dessert featuring warm, sweet apples filled with brown sugar and spices, perfect for any occasion.
Ingredients
- 4 large apples
- 1/4 cup brown sugar
- 1 teaspoon cinnamon
- 1/4 cup raisins
- 1/4 cup chopped nuts (walnuts or pecans)
- 2 tablespoons butter
- 1/2 cup apple juice or water
Instructions
- Preheat the oven to 350°F (175°C). Core the apples, leaving the bottom intact, and place them upright in a baking dish.
- In a bowl, mix together the brown sugar, cinnamon, raisins, and chopped nuts to create the filling.
- Stuff the mixture into each cored apple and top with a small piece of butter.
- Pour apple juice or water into the baking dish, then bake for 25-30 minutes or until the apples are tender.
Notes
Serve warm, optionally with vanilla ice cream or whipped cream. Store leftovers in an airtight container in the fridge for up to 3 days.
- Prep Time: 10 minutes
- Cook Time: 30 minutes
- Category: Dessert
- Method: Baking
- Cuisine: American
Nutrition
- Serving Size: 1 serving
- Calories: 190
- Sugar: 22g
- Sodium: 40mg
- Fat: 7g
- Saturated Fat: 4g
- Unsaturated Fat: 3g
- Trans Fat: 0g
- Carbohydrates: 32g
- Fiber: 3g
- Protein: 2g
- Cholesterol: 10mg