Recipe Information
- Prep Time: 20 minutes
- Cook Time: 60 minutes
- Total Time: 1 hour 20 minutes
- Servings: 12 servings
- Difficulty Level: Medium
Nutrition Information
- Calories per serving: Approx. 325 calories
- Protein: 5g
- Carbohydrates: 27g
- Fat: 22g
- Fiber: 0g
- Sugar: 15g
- Sodium: 250mg
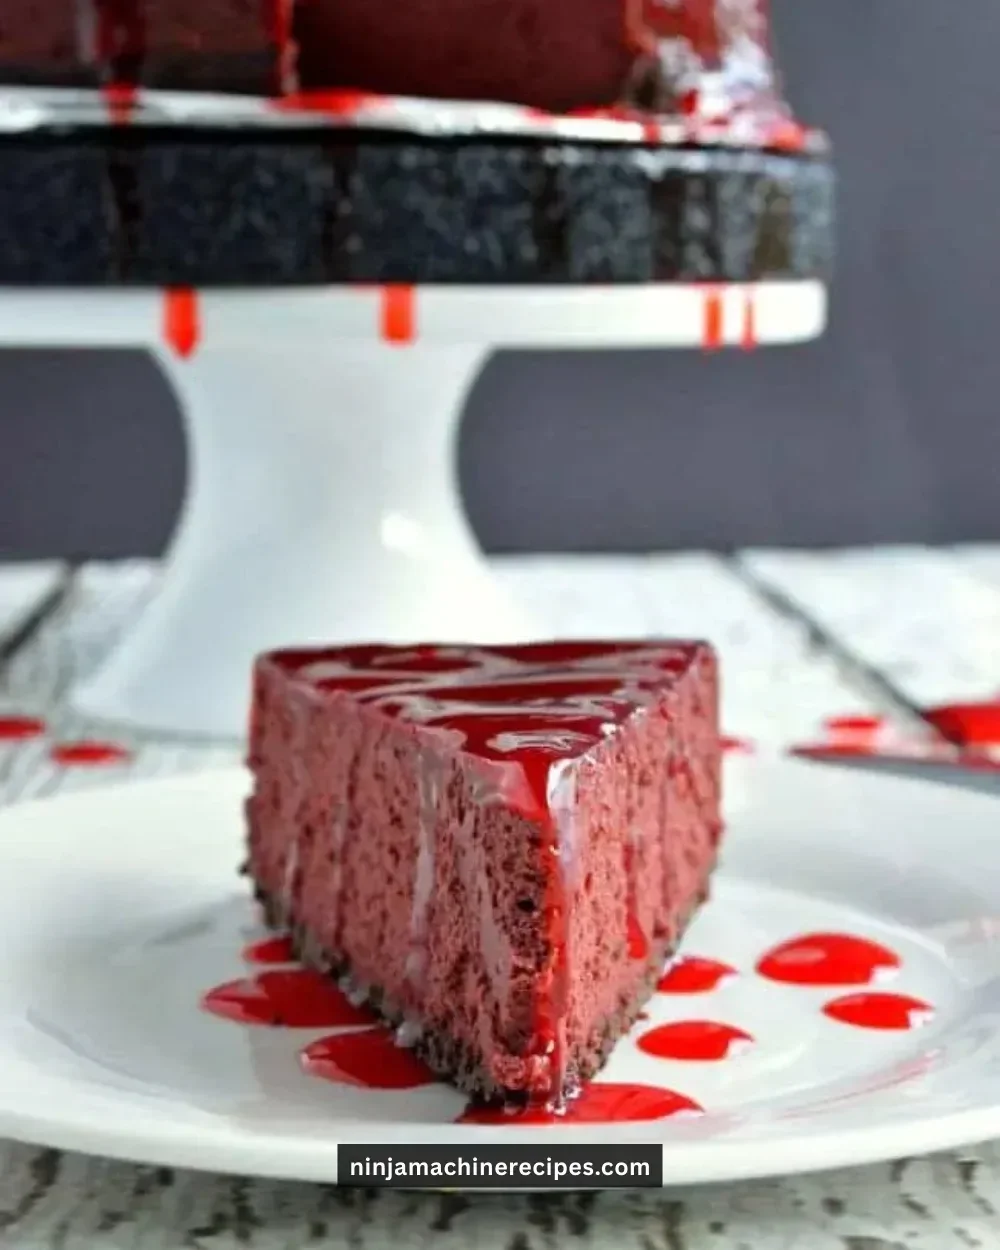
Why Make This Bloody Good Cheesecake
If you’re looking to impress with a dessert that’s as striking as it is delicious, this Bloody Good Cheesecake is the perfect choice. With its creamy texture, rich flavor, and a whimsical "bloody" twist, this cheesecake instantly elevates any gathering or occasion. The vibrant appearance will surely be a conversation starter, while the combination of classic cheesecake flavors and a hint of strawberry puree creates a taste that remains in your memory long after the last bite.
Making this cheesecake is not only fun but also allows for creativity, whether you want a rich red swirl or a smooth finish. It’s excellent for Halloween parties, themed celebrations, or just a treat for yourself on a cozy evening.
How to Make Bloody Good Cheesecake
Creating the ultimate Bloody Good Cheesecake is easier than you might think. Follow these steps carefully, and you’ll be on your way to mastering this dessert.
Ingredients:
- 1 1/2 cups graham cracker crumbs
- 1/2 cup unsalted butter, melted
- 1 cup sugar
- 4 (8 ounce) packages cream cheese, softened
- 4 large eggs
- 1 teaspoon vanilla extract
- 1 cup sour cream
- 1/4 cup strawberry puree
- Red food coloring (optional)
Directions:
Step 1: Preparation
Preheat your oven to 325°F (160°C). While it heats up, grease a 9-inch springform pan to ensure easy release once your cheesecake is set.
Step 2: Mixing the Crust
In a bowl, combine the graham cracker crumbs and melted butter until well combined. Press this mixture firmly into the bottom of your prepared springform pan to form a solid crust.
Step 3: Making the Cheesecake Batter
In a large mixing bowl, beat together the softened cream cheese and sugar until the mixture is smooth and creamy. Add the eggs one at a time, mixing well after each addition to ensure everything is fully combined. Stir in the vanilla extract and sour cream until you have a luscious, homogenous batter.
Step 4: Adding the ‘Bloody’ Effect
To add a fun and spooky twist, mix the strawberry puree with a few drops of red food coloring if desired. Gently swirl this mixture into the cheesecake batter, creating eye-catching marbling.
Step 5: Baking the Cheesecake
Pour the cheesecake batter over the crust in the springform pan, spreading it evenly. Bake in the preheated oven for 50-60 minutes, until the center looks set but still has a slight jiggle.
Step 6: Cooling and Refrigerating
Once done, turn off the oven and let the cheesecake cool inside with the oven door slightly ajar for 1 hour. This gentle cooling prevents cracks from forming. Afterward, refrigerate for at least 4 hours or overnight before removing it from the springform pan.
Step 7: Serving
Serve your Bloody Good Cheesecake chilled, perhaps with a drizzle of extra strawberry puree or a few fresh berries on the side for garnish. Enjoy!
How to Serve Bloody Good Cheesecake
This cheesecake shines as a standalone dessert but also pairs beautifully with various accompaniments. Consider serving with fresh berries, a dollop of whipped cream, or an extra swirl of strawberry puree. For a festive touch, add Halloween-themed decorations like edible spider candies or chocolate shavings to enhance its visual appeal.
How to Store Bloody Good Cheesecake
To keep your cheesecake fresh, store it in the refrigerator covered with plastic wrap or in an airtight container. It can last for about 4-5 days in the fridge. If you need to store it longer, you can freeze it for up to 2 months; just wrap it tightly to prevent freezer burn.
Expert Tips for Perfect Bloody Good Cheesecake
- Room Temperature Ingredients: Make sure your cream cheese and eggs are at room temperature for easier mixing.
- Don’t Overmix: Once you add the eggs, mix gently to avoid over-aerating, which can lead to cracks.
- Water Bath: For an extra creamy texture, consider baking the cheesecake in a water bath to regulate the temperature.
- Chill Thoroughly: Chilling overnight is ideal, as it allows the flavors to meld and the texture to firm up.
- Garnish Creatively: Use fresh fruits or themed decorations to match the occasion.
Delicious Variations
- Chocolate Swirl Cheesecake: Add cocoa powder to half of the batter before marbleizing to create a chocolate version.
- Berry-Filled Cheesecake: Incorporate mixed berry puree into the batter or as a topping for a fruity flair.
- Nutty Crust: Replace the graham cracker crumbs with crushed nuts or cookies for a different flavor profile.
Frequently Asked Questions
1. Can I use low-fat cream cheese?
Yes, while it may alter the texture slightly, using low-fat cream cheese is a viable option if you want a lighter cheesecake.
2. How can I tell when the cheesecake is perfectly done?
The cheesecake is done when the edges are set and the center still slightly jiggles when you shake the pan. It will firm up as it cools.
3. Can I make this cheesecake gluten-free?
Absolutely! Simply switch out the graham cracker crumbs for a gluten-free alternative, such as gluten-free cookies or graham cracker crumbs.
4. How do I prevent my cheesecake from cracking?
Mix your batter gently and avoid over-baking. Cooling the cheesecake gradually in the oven also helps minimize cracks.
5. can I add other flavors to the cheesecake?
Yes, feel free to experiment with flavors such as lemon zest, espresso powder, or different fruit purees to create your own unique version.
Conclusion
Don’t miss the chance to whip up this Bloody Good Cheesecake for your next gathering. Its beautiful appearance and rich, creamy flavor are guaranteed to delight your guests and make a memorable impact. Whether it’s for a holiday celebration or simply to enjoy at home, this cheesecake is a treat that everyone will love. So, gather your ingredients and have fun crafting this stunning dessert that’s as delightful to eat as it is to look at!