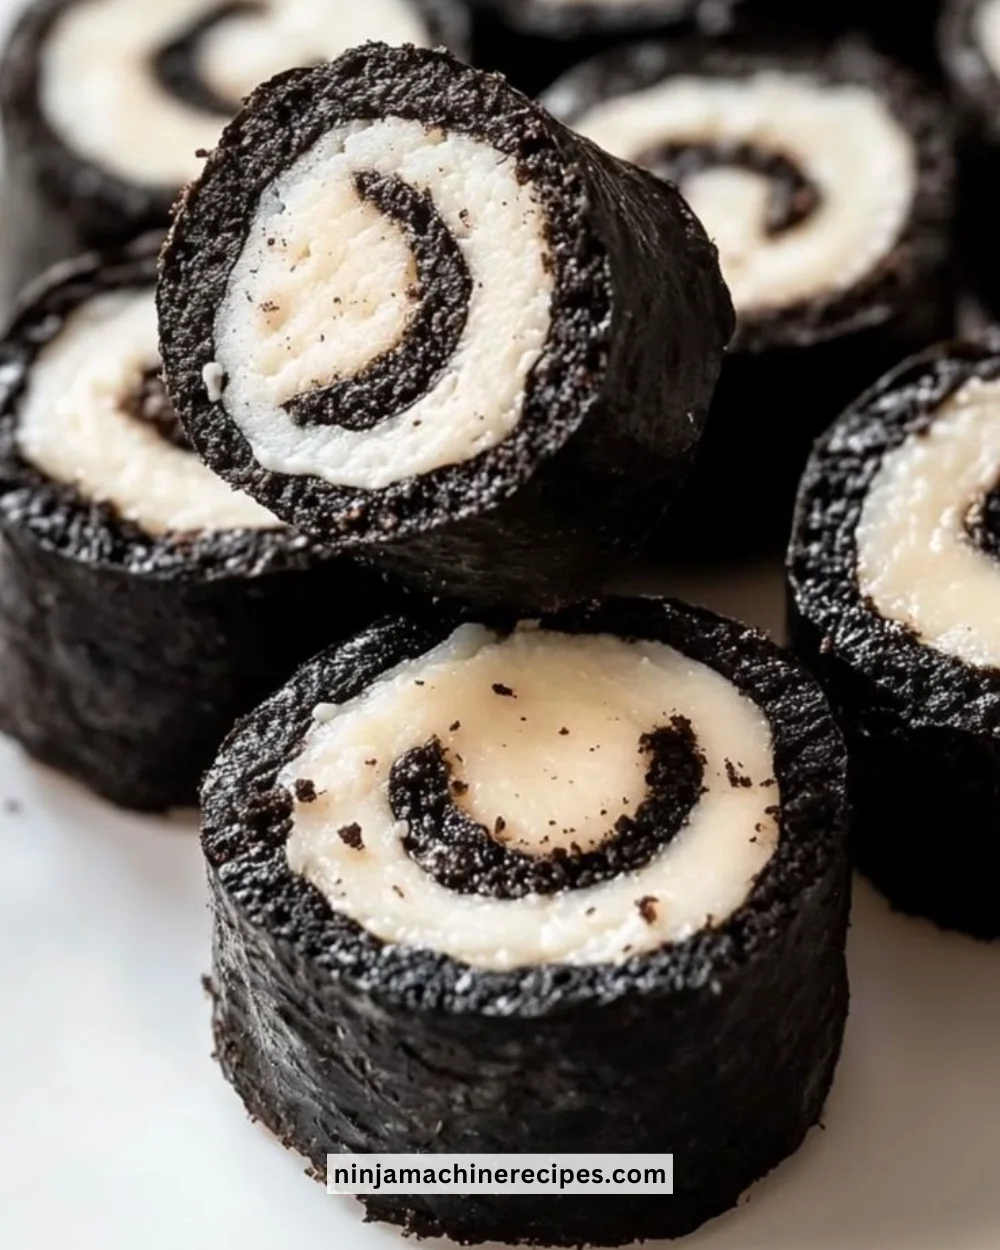
Oreo Sushi Rolls are a fun and indulgent twist on traditional sushi, perfect for parties, movie nights, or simply a sweet snack. These delightful rolls combine the beloved flavor of Oreos with creamy fillings to create a dessert that’s as delicious as it is visually appealing. Whether you’re impressing guests or satisfying a sweet tooth, this recipe is sure to delight everyone!
Recipe Information
- Prep Time: 20 minutes
- Cook Time: 0 minutes
- Total Time: 20 minutes
- Servings: 4
- Difficulty Level: Easy
Nutrition Information
- Calories per serving: Approximately 290
- Protein: 4g per serving
- Carbohydrates: 40g per serving
- Fat: 15g per serving
- Fiber: 1g per serving
- Sugar: 25g per serving
- Sodium: 120mg per serving
Why Make This Oreo Sushi Rolls
Oreo Sushi Rolls are not only a visual treat but also a deliciously fun way to enjoy dessert! They are incredibly easy to make, requiring no baking, and they can be customized with various fillings to suit your taste. The creamy, sweet blend of crushed Oreos and cream cheese creates a satisfying texture that pairs beautifully with the optional toppings like Nutella and fresh fruit. It’s a playful dessert that kids and adults alike will love, making it perfect for any occasion.
How to Make Oreo Sushi Rolls
Creating Oreo Sushi Rolls is a breeze! Follow these simple steps to whip up your own batch of these sweet treats.
Ingredients:
- 1 package of Oreo cookies
- 1 cup of cream cheese or whipped cream
- 1/2 cup of Nutella (optional)
- Fresh fruit (optional, such as strawberries or bananas)
- Sprinkles (optional)
Directions:
-
Step 1: Preparation
Crush the Oreo cookies into fine crumbs using a food processor or by placing them in a plastic bag and rolling over them with a rolling pin until they are finely crushed.
-
Step 2: Mixing
In a bowl, mix the crushed cookies with cream cheese until a dough forms. This mixture should be smooth and moldable, almost resembling cookie dough.
-
Step 3: Rolling Out
Roll out the dough on a piece of parchment paper into a rectangle. Use your hands or a rolling pin to flatten it to about 1/4 inch thick for easy rolling.
-
Step 4: Filling
Spread your desired filling, such as Nutella, fresh fruit slices, or sprinkles, evenly over the rolled dough, leaving a small border around the edges.
-
Step 5: Rolling
Carefully roll the dough into a log shape using the parchment paper to help you. Go slowly to ensure a tight roll without tearing the dough.
-
Step 6: Chilling
Chill the rolled-up dough in the fridge for about 30 minutes. This step helps firm up the rolls, making them easier to slice.
-
Step 7: Slicing
Once chilled, slice into bite-sized pieces with a sharp knife and serve immediately.
How to Serve Oreo Sushi Rolls
Serve Oreo Sushi Rolls on a vibrant platter for a stunning presentation. They make a fantastic addition to dessert tables or as a sweet treat for gatherings. Consider drizzling some extra Nutella or chocolate sauce on top for added flair and flavor!
How to Store Oreo Sushi Rolls
Store any leftover Oreo Sushi Rolls in an airtight container in the refrigerator for up to 3 days. If you notice the rolls becoming soft, it’s best to consume them sooner rather than later for the best texture and flavor.
Expert Tips for Perfect Oreo Sushi Rolls
- Make sure to use room temperature cream cheese to ensure a smooth mix.
- Feel free to experiment with different fillings beyond Nutella and fruit—try peanut butter, marshmallow fluff, or even candy pieces for a unique twist.
- Using parchment paper helps with both rolling and prevents sticking, making the process easier.
Delicious Variations
- Chocolate Lovers: Add a layer of chocolate ganache in addition to the cream cheese.
- Fruit Bliss: Incorporate finely chopped fresh fruits along with a spread like cream cheese.
- Nutty Crunch: Mix in crushed nuts or granola for added texture.
Frequently Asked Questions
-
Can I use reduced-fat cream cheese?
Yes, you can substitute reduced-fat cream cheese, but the taste and texture may vary slightly. -
What if I can’t find Oreos?
Any similar chocolate sandwich cookie will work in this recipe if Oreos are unavailable. -
Can I freeze Oreo Sushi Rolls?
Yes, you can freeze them. Just wrap them tightly in plastic wrap before placing them in an airtight container. Thaw in the refrigerator before serving. -
How can I make these gluten-free?
Use gluten-free chocolate sandwich cookies and ensure all other ingredients are gluten-free. -
What are some good toppings?
Consider using extra crushed Oreos, chocolate drizzle, or colorful sprinkles for a fun touch!
Conclusion
Oreo Sushi Rolls are a delightful twist on traditional desserts that will surely please anyone with a sweet tooth. With their creamy filling and crunchy exterior, they are perfect for any occasion. Easy to make, customizable, and oh-so-tasty, this dessert is not just a treat for your taste buds but also a feast for the eyes! Whip up a batch, and get ready to impress your friends and family with this fun dessert!
Print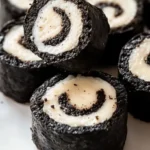
Oreo Sushi Rolls
- Total Time: 20 minutes
- Yield: 4 servings 1x
- Diet: Vegetarian
Description
A fun and indulgent twist on traditional sushi, these Oreo Sushi Rolls combine crushed Oreos and creamy fillings for a delightful dessert.
Ingredients
- 1 package of Oreo cookies
- 1 cup of cream cheese or whipped cream
- 1/2 cup of Nutella (optional)
- Fresh fruit (optional, such as strawberries or bananas)
- Sprinkles (optional)
Instructions
- Crush the Oreo cookies into fine crumbs using a food processor or by placing them in a plastic bag and rolling over them with a rolling pin.
- Mix the crushed cookies with cream cheese until a dough forms.
- Roll out the dough on parchment paper into a rectangle, about 1/4 inch thick.
- Spread your desired filling evenly over the rolled dough, leaving a small border around the edges.
- Carefully roll the dough into a log shape using the parchment paper.
- Chill the rolled-up dough in the fridge for about 30 minutes.
- Once chilled, slice into bite-sized pieces and serve immediately.
Notes
Serve on a vibrant platter and drizzled with extra Nutella or chocolate sauce for added flair.
- Prep Time: 20 minutes
- Cook Time: 0 minutes
- Category: Dessert
- Method: No-bake
- Cuisine: American
Nutrition
- Serving Size: 1 serving
- Calories: 290
- Sugar: 25g
- Sodium: 120mg
- Fat: 15g
- Saturated Fat: 7g
- Unsaturated Fat: 6g
- Trans Fat: 0g
- Carbohydrates: 40g
- Fiber: 1g
- Protein: 4g
- Cholesterol: 30mg